DIY Shutters!
I know exactly what you’re thinking, “Well, well, well, look whose FINALLY back to blogging!” Yes, I know! I absolutely cannot believe that almost 2 months have gone by without a single post! All I have to say is that since adding baby #2 this past May I appreciate my mom (and all moms for that matter) even more than I did when I had Landon. And let me tell you something, when I had Landon my awe for mothers everywhere went through the roof!
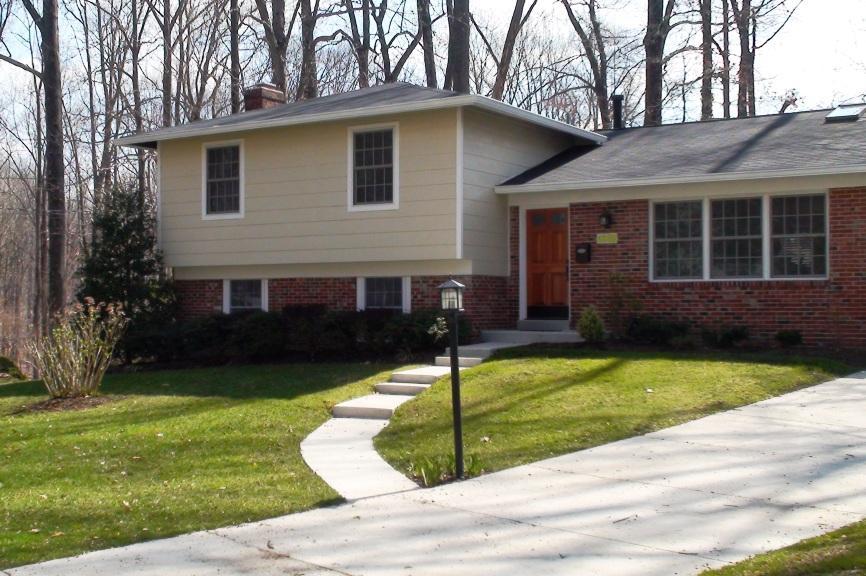
Now, back to business. After replacing the faux tudor look of the front of our house with clap board siding (which was later painted a light tan color) we thought the house was still missing something.

The house originally had shutters but they were in poor shape and purely decorative.

Yes, I realize (as I’m sure most of you do) that for several decades now houses have been built with non-functioning shutters (a.k.a shutters that are there for aesthetic purposes only). However, Pavlo seems to think that having shutters just for “the look” is completely ridiculous so we came to a compromise. We agreed that if he could get all the hardware for the shutters for under $100, then he could make them functional (even if we will absolutely NEVER use them!). First and foremost Pavlo began building the new shutters.
The main components of the shutters are 1/2″ plywood, pine exterior trim and stainless steel screws. Pavlo cut the pine trim into 5 pieces per shutter; 2 longer and and 3 shorter. Grooves were cut into the backside of each of these 5 pieces creating a place to receive the plywood panels.


However, before adding the plywood, the 5 trim pieces were joined together using wood glue and were clamped into place. Next stainless steel screws were put in because, let’s face it, wood glue just wouldn’t be durable enough.

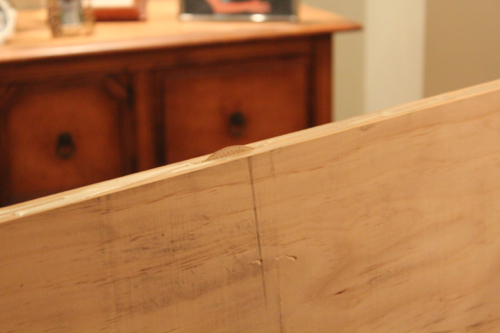
The final frame to the shutters looked like this:

Next the plywood was cut and then placed into the frames. It was attached using both wood glue and screws resulting in a beautiful 2 paneled shutter. Actually it resulted in 4 of them!

Ok, ok, so they weren’t exactly beautiful just yet. We still had to do some light sanding, caulking, priming and painting before being able to officially call them beautiful. At least that’s what I thought until the paint went on and I started to doubt my choice of colors. I wanted something that popped but in the sunlight this color was beyond just a pop!


I had Pavlo hang the shutters despite my doubts, just in case I was wrong and the shutters looked better once in place.


Yup, I was wrong! Now, being a UVA grad I actually really liked the brilliant blue color…just not for my house! I immediately went out and chose a different shade of blue which looked MUCH better (just in case you’re curious the new color blue is Sherwin Williams’ “Dignified Blue.”) A few of our neighbors even ran over after the final coat went up and admitted that they were extremely relieved we had changed the color! I found this very amusing!

As you may have noticed the shutters were hung using hinges. Yuppers, this means Pavlo was able to hold up his end of the deal and find hardware for less then $100. He actually used a galvanized “L” bracket with nylon washers and stainless steel screws to act as hinges. He also purchased tie backs (a.k.a shutter dogs) for a mere $80 for all 4 windows (8 shutters). Yes, I was impressed by it too!


So in the end it was a win/win for Pavlo and I. I got shutters that add just the right amount of color and character to the house and Pavlo got to have his functioning shutters…even if they’ll NEVER be used! At least he’s happy! I guess marriage really is about compromise!

I love that you made them functioning!!
The fake shutters drive me crazy!
What size windows are they?
What size exterior trim did you use? I’d like to build the same thing but they have to be functional for hurricanes (I’m down south and we have a big one barreling toward us right now). Should I use a 2×4 for trim? Seems like a 1 inch won’t allow enough for enough strength to hold the plywood considering I’d also like to use 3/4 inch plywood.
We have a western facing eight foot wide window that is making the room unbearably hot in the summer even with wide levelor blinds inside the window that are shut all day. The a/c runs almost all day too trying to cool the upstairs largely because of the sun beating down in the window. Do you have any suggestions about how to make or find attractive closing shutters that are made of wood and could astetically look close to the rest of the shutters we have on our exterior? Bigger question…. How do you open and close exterior shutters easily?
Where did you find the shutter dogs for an affordable price?
I think we got them at houseofantiquehardware.com! Though a quick Google search brought up several options! Good luck!
Hello
What color is the first blue. I love that color
Hi. I love your shutters. Do you have pics of the way you made the hinges? I’m a visual learner. Can you explain what a tenon is? Plz and thanks.
No, sorry I don’t have detailed pictures of how he made the hinges. Actually, in the house we just sold we built the exact same shutters but just bought hinges. According to Pavlo, it was worth the extra money! 🙂 Also, the house we just sold was a 1930’s home so we wanted the shutters to actually be operable (not that we’d ever really need them, just true to the history of the house). Where as in the first house (a 1960’s house) most people just mount them without hinges which we found a little boring. Creating our own, inexpensive, hinges gave us the look without the cost but most likely they wouldn’t have been as operable as the most recent house’s shutters. Wow, sorry for the long winded (and delayed) answer.
what size lumber did you use for the frame?
Sorry for the delay! If you’re still interested the size of the lumber is 5/4″ x 4″.
Hey, they look great and I agree totally with if you are going to make or do something the task might as well be functional as well as aesthetically appealing. I wanted to ask if you were to shut them, how would you keep them closed? I didn’t see a latch or something on the back.
Nice shutters. Too bad your neighbors are so closed-minded about the colors on YOUR house however. Personally, I’d have kept the bright blue. I like the color….and if the neighbors don’t like them, tell them to close THEIR shutters.
Should have replied long ago, mostly because I totally agree! People are extremely opinionated…too opinionated! Thanks for your feedback, Your comment still has me laughing and inspiring me to start posting again! 🙂
I am making these now and I have cut out a 1/2 inch by 3/4 rabbit on all 5 pieces. But now I have a gap at all the joints where the 3 cross pieces connect. How did you handle this? Thanks Barry
Barry,
Sorry for the late response and hopefully this is not too late. The small pieces (or stiles) will need to have a matching tenon that can fit into the rabbit of the rail. Once glued up and screwed, this will create an extremely strong shutter. I am planning on making shutters this weekend for our current house and can take some pictures if that helps. Let me know.
Just got a new table saw. This is the exact style shutter I plan on making! I hope mine look as good as your’s!
Thanks for posting this! It inspired me to do the same thing for my house. They turned out great!