A Twist on the Traditional
Even though we’re living amongst boxes, we gotta keep the renovations going! I mean, the only way to get everything unpacked and in place is to actually complete rooms!
In the last post I mentioned how our plan was to work room-by-room and we’re starting with the kitchen. First up, the backsplash!
I’ve actually had the materials for the backsplash since, well, we had countertops installed (that happened all the way back here). Just like with the rest of this house we’re really trying to update and modernize without destroying the charm that comes with our older house. I know I’ve said that about a million times already (and will probably say it a million more) but it definitely rings true when it comes to our new backsplash.
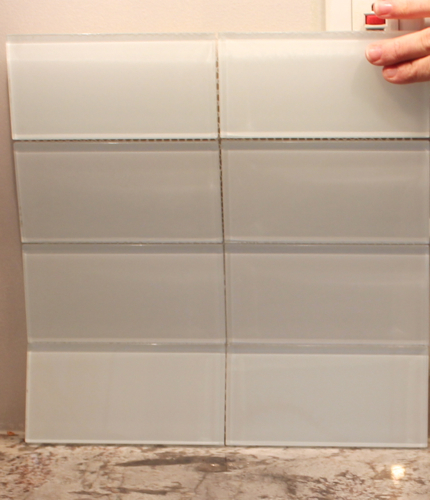
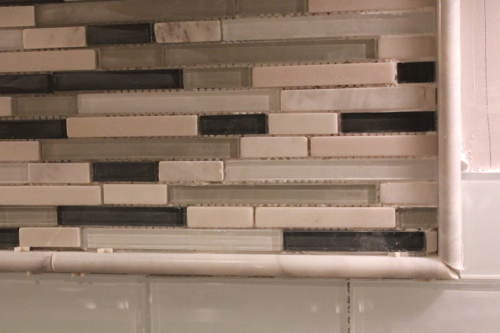
Up in the bathroom that we completed (and have yet to decorate) we set the tile for the shower surround and for the floor in a traditional subway style pattern (more on that here and here). Not only is the subway pattern true to the age of the house but I absolutely love it. It’s clean, streamline and timeless. I wanted to bring that same pattern into the kitchen’s backsplash but I wanted to do it with a twist. I ran through my options of changing up the tile size, style or even color and, rather quickly, decided on changing up the type of tile used in order to modernize the look. Rather than using the standard (though beautiful) white ceramic tile like we used in our bathroom I selected white glass tiles.

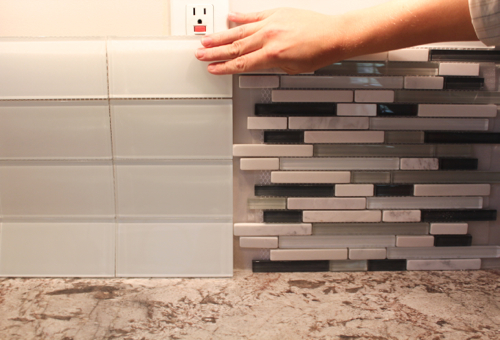
I love them! I love their shiny finish, I love how they coordinate with the counters, I love how the blue undertones of glass go perfectly with the cabinetry. I just love them! However, despite my affinity for these glass tiles I didn’t want them to make up the WHOLE backsplash, I wanted some sort of accent tile for above the range. I searched and searched before finally realizing the perfect sheets of tile were at the local hardware store and were one of the first sheet of mosaic tile I glanced at during my search. Ahh, I shoulda known!
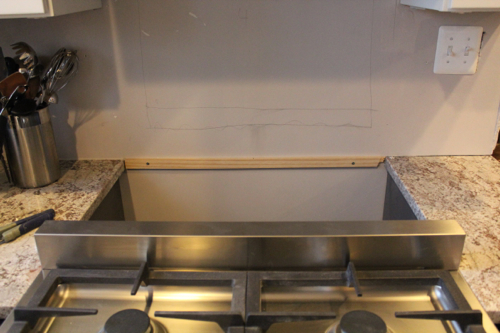
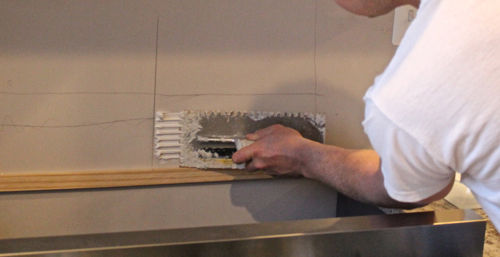
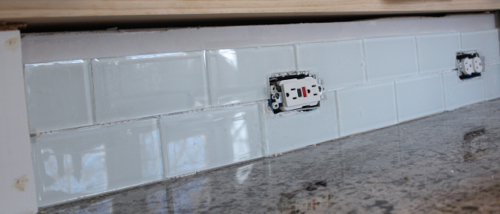
So, with all the materials sitting ready to go, we got to tackling the backsplash. I should really say Pavlo started it while I unpacked more boxes so that we looked less like squatters/hoarders. Anyways, we began by installing a ledger board behind the range since that was one area where the tiles had no countertop to help support them.
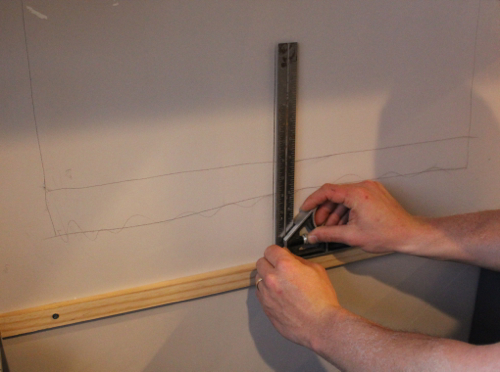
Then, the center was measured:
Next, mastic was spread and tiles were set using the marked center as a reference point.
After night numero uno we had this:
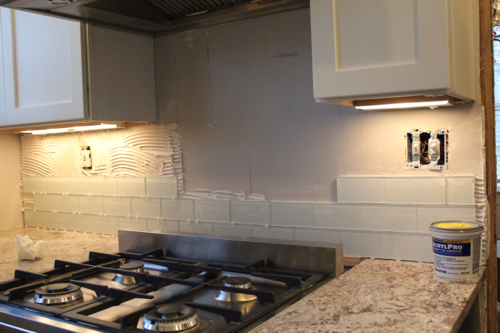
And by the end of the weekend (we took it easy on Sunday) we had this:
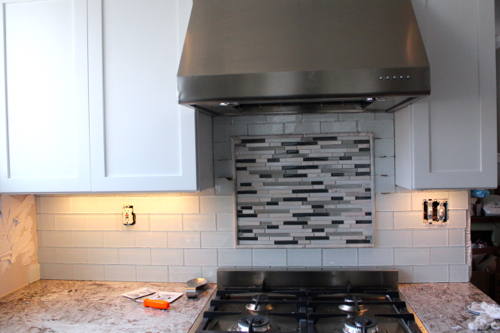
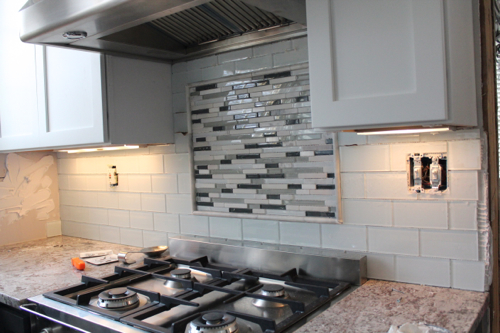
As you can see I chose to border in the mosaic accent tiles with marble pencil tile making it look even more distinguished.
We still have two smaller walls to finish up (which Pavlo is working on while I write this) and hopefully they will be completed and ready for grout by tomorrow night.
I did a similar stone backsplash with the pencil trim over a range in my friend’s condo. Turned out great. I love what you chose. I want to come by one day and see the house.
Absolutely!