Upstairs Bathroom Renovation

The first room we finished 100% was the upstairs bathroom. It was the only full bathroom in the house when we closed and is currently the only bathroom in the entire house. Yes, we removed the powder room (you’ll understand why later) so until our additions are complete, we’re a five person family functioning with one bathroom. Most days it’s just fine, then the littlest one has to go potty and with her there’s no waiting!
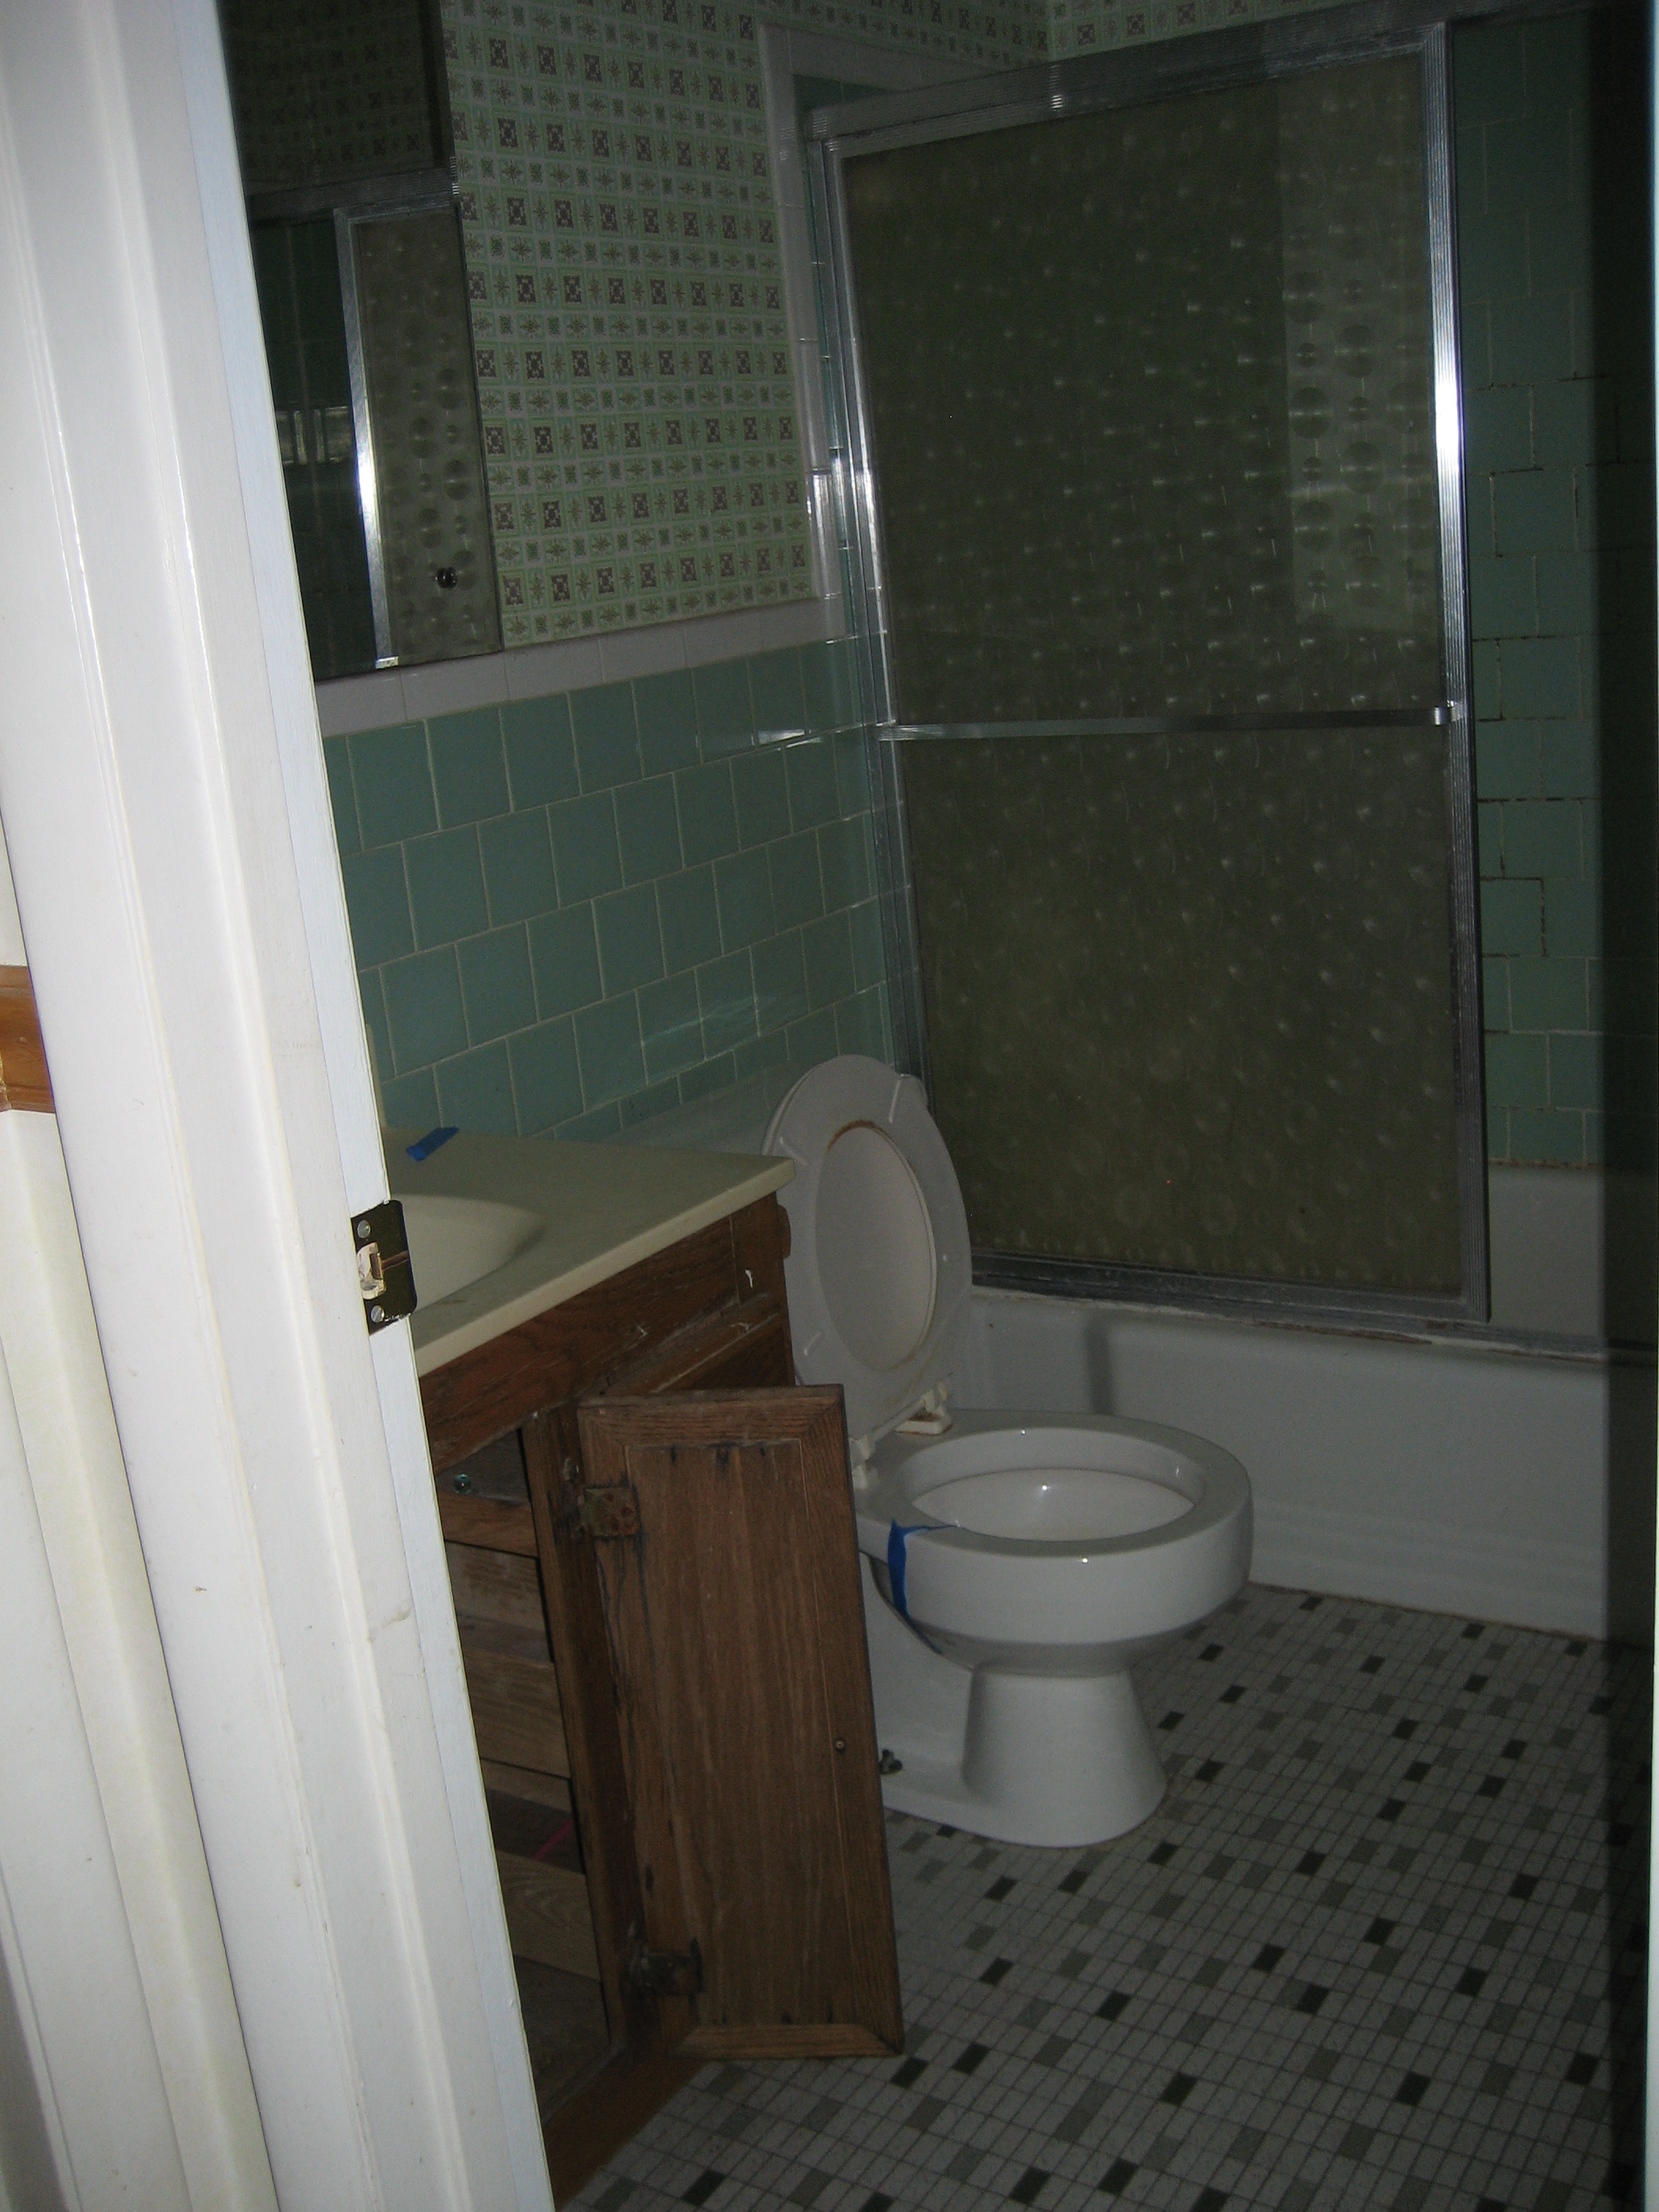
This is the space we were given to work with:

The space was clearly very tight, and I only wish I meant “tight” by today’s slang definition! Nope, instead it was literally cramped meaning our first task was to use the square footage given, but make it feel bigger. Challenge accepted!
Upon glancing at this picture anyone would notice the massive amount of space the radiator takes up. In this picture it looks like a shelf (because of a cover) and is sitting between the vanity and the window. Radiant heat is actually a very comfortable and cost effective way to heat a space but I have a very difficult time with radiators merely because they always feel like they’re sitting right smack in the middle of a room! They really make furniture and room configurations challenging. I mean, this is a 1920’s home, most houses built back then have rooms that are considered smaller by today’s standards, it’s reality.
So, Pavlo and I came to a compromise. We decided to keep the radiant heat but to convert it into underfloor radiant heat. Pavlo gets the radiant heat and I get my square footage back! Sounds great, right? In theory it actually was the best scenario, however, our budget wasn’t having it! No matter how we crunched the numbers and tried to make it work, it ultimately wasn’t going to be worth the expense. You see, regardless of how we brought heat into the house, we still needed central AC which was basically everything you needed for forced air except for the furnace. So, that money was being spent no matter our heat source. Since a furnace was going to be a fraction of the price of running radiant heat underneath our floors (and it would take several years to make up that price difference in heat savings) we decided a brand new HVAC system and furnace made the most sense, therefore we removed all of the radiators and moved forward with the reno. Pavlo may or may not be mourning them still, you’ll have to ask him. The silver lining to removing the radiant heat was that we now had more usable space!
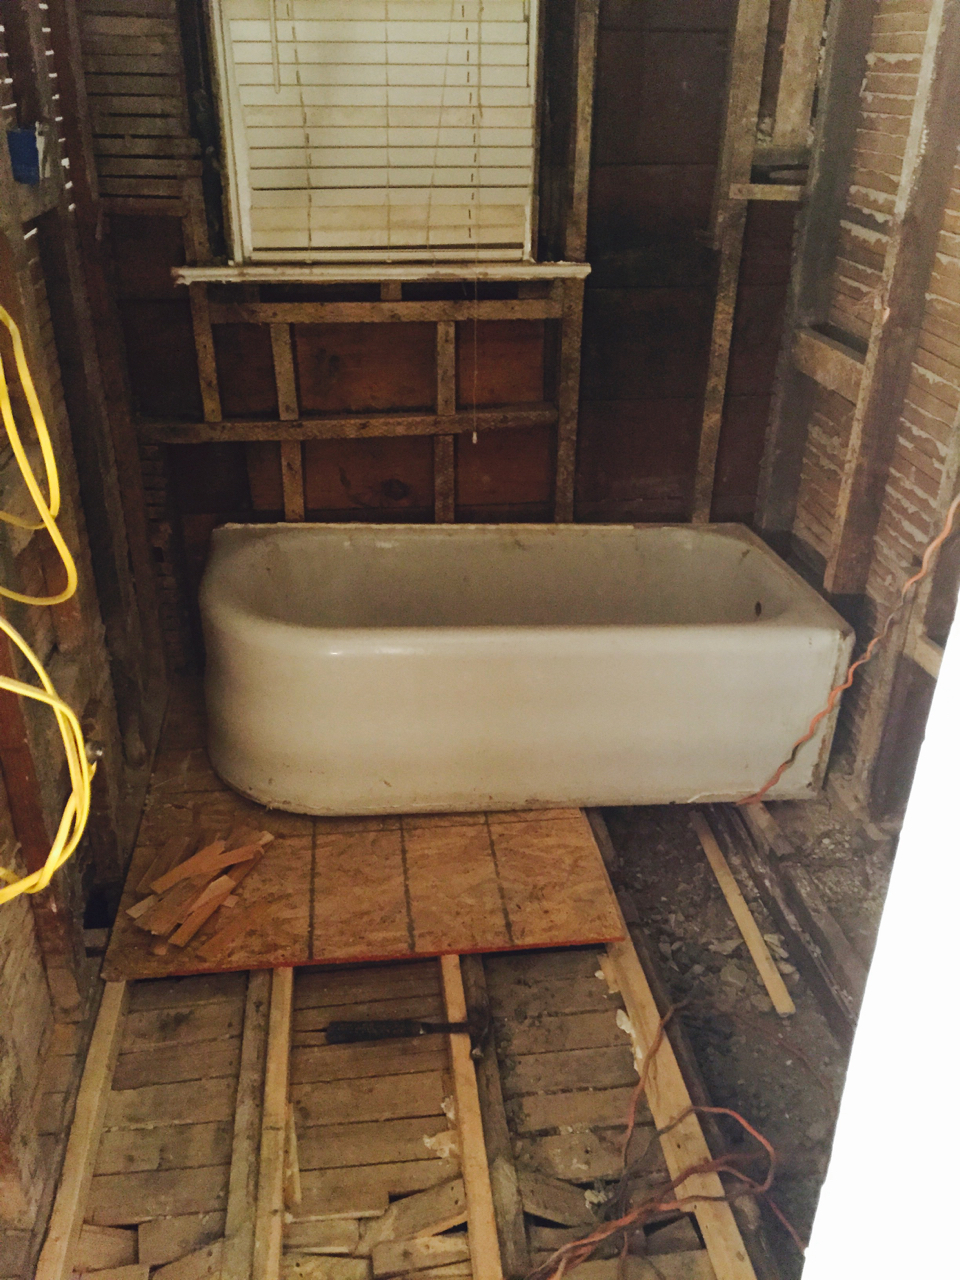
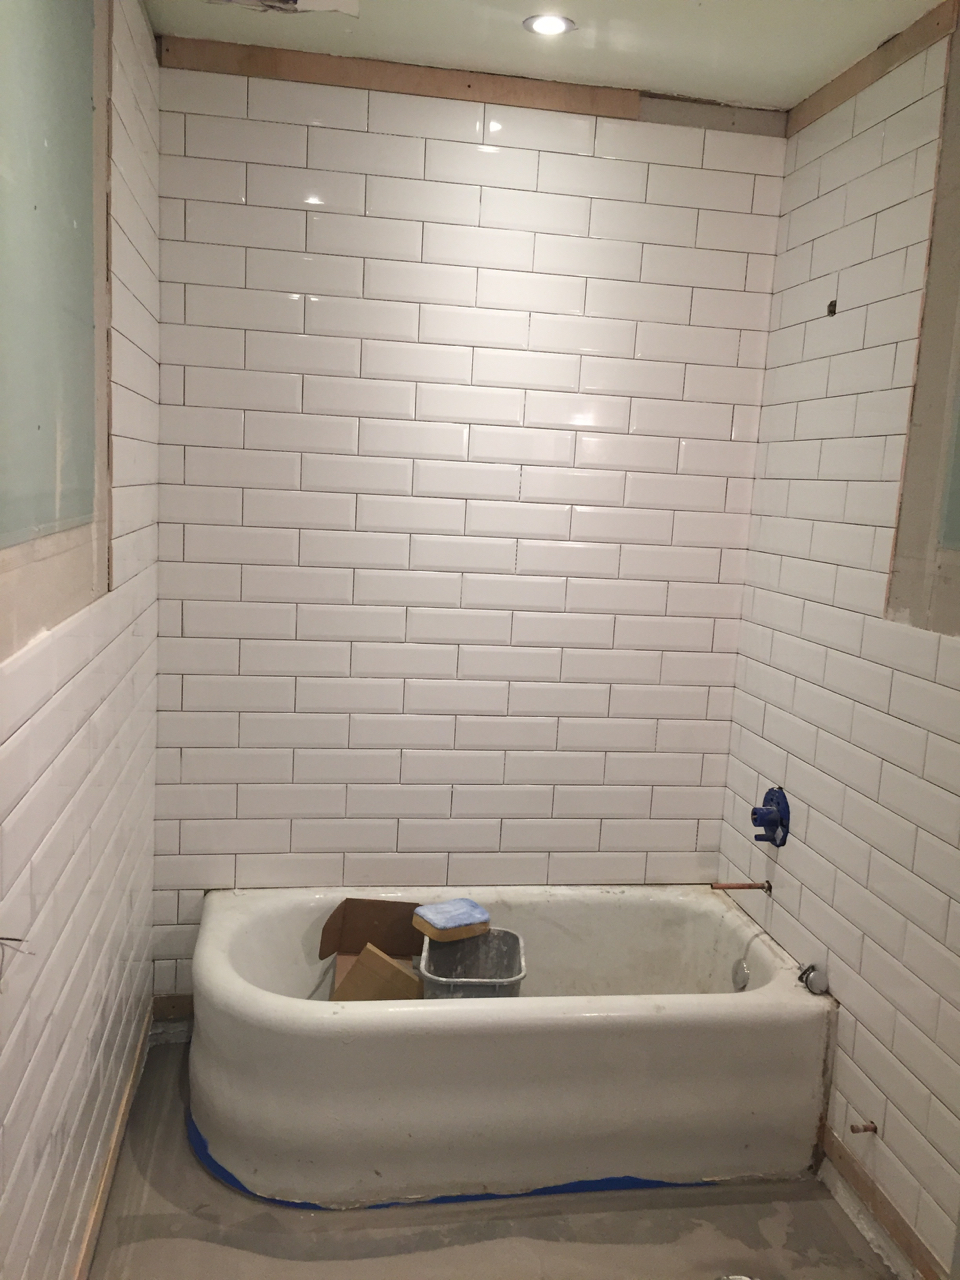
Enough talk, back to the bathroom. Nearly the entire space was demo’d with the exception of the cast iron bathtub that was in surprisingly good shape, it just needed a good scrub. If we’re being honest, I wanted a new tub but Pavlo was strangely attached to this original feature of the house. Given that it was easily salvageable, and the fact that he lost the battle of the radiators, I gave him this one! I know, I know, I’m a really nice person. We even removed the window since that back wall would soon become an interior wall separating the original house from the new addition going up out back. 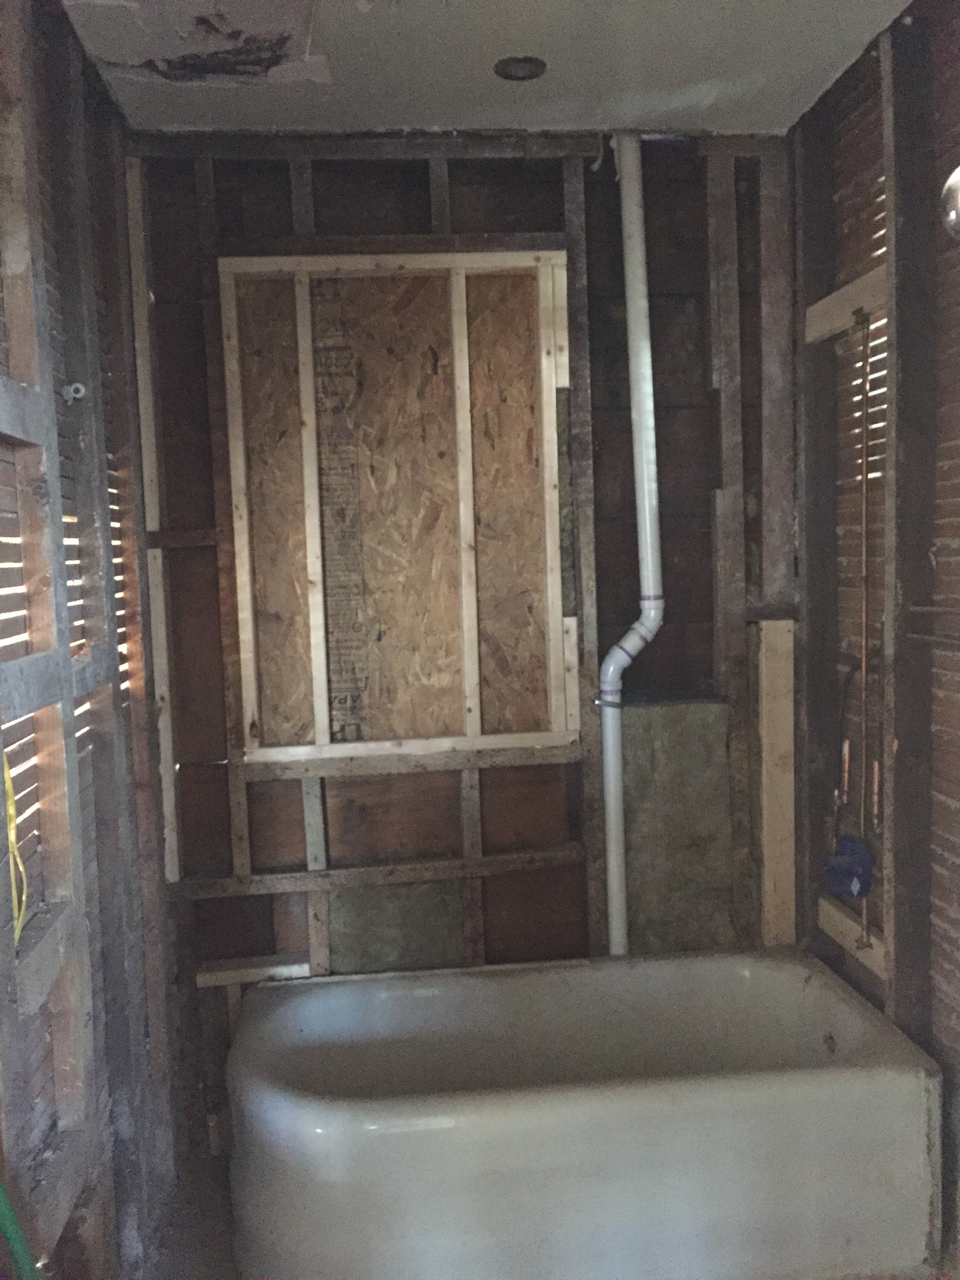
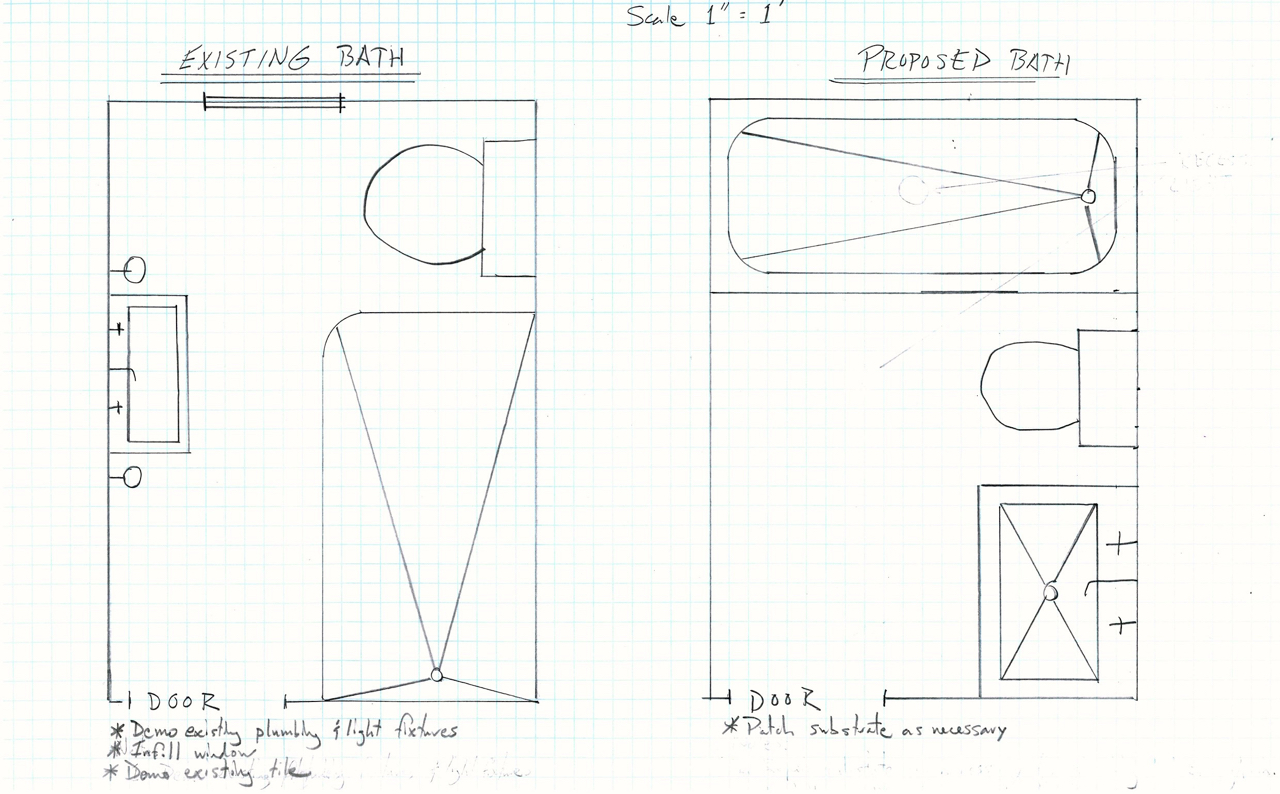
You’ll also notice from the picture above that we flipped the tub around to the back wall. This gave us the ability to use the entire right side of the bathroom for a vanity and the toilet. Having this “L” shape in the bathroom really opened it up and made it feel bigger. We actually sketched the new layout to scale prior to moving the incredibly heavy cast iron tub. The only thing missing from “Existing Bath” portion of the sketch is the radiator I just went on and on about. Imagine it in the upper left hand corner of the image, right next to the vanity.
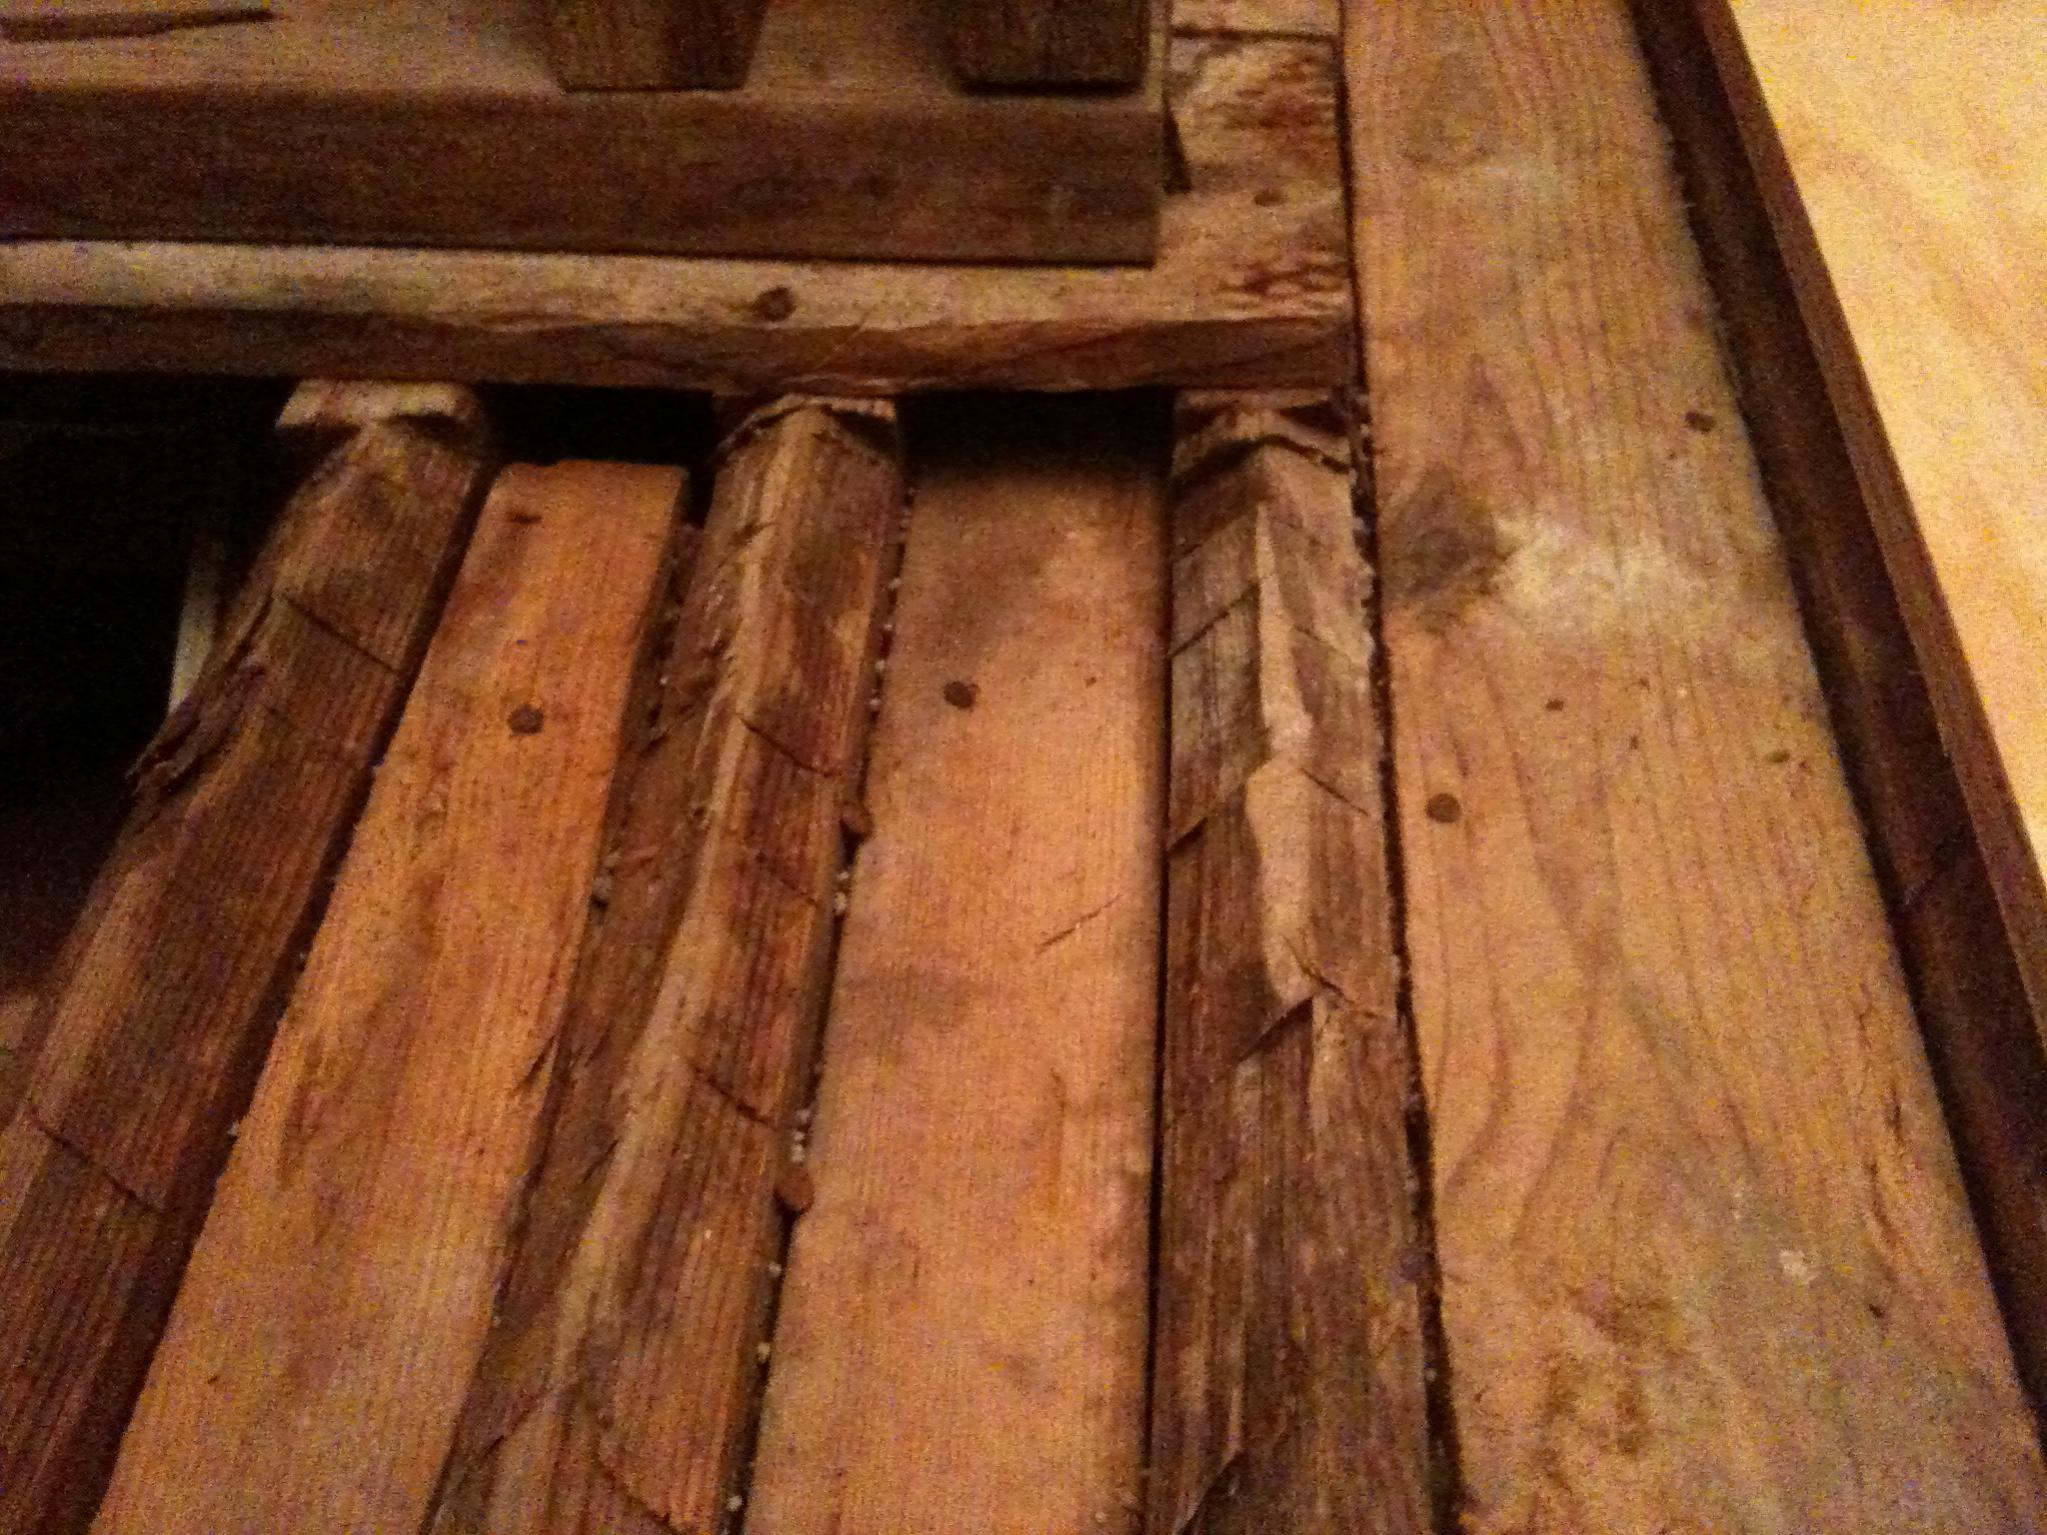
With the bathroom gutted Pavlo moved on to have all the electrical and plumbing updated. Due to the new plumbing, and the condition of the older bathroom, he also reframed the floor. This was only necessary because of how tile floors were framed in the 1920s. Sub flooring was not used in tiled spaces back then, instead 3″-4″ of mud set (thick set) were used to create the flat surface on which to tile. Beneath all of that the joist came to a point. We never snapped a picture of our bathroom after the mud set was demo’d, but I found this one on an internet forum discussing the exact topic, at least it’s an example for you to understand the situation a little better!
With the modern materials we have today (eg. cement board and crack membrane) it’s easier to rip the mud set out and then reframe the floor by sistering the old, pointed joist with new 2″x6″ joist to create a flat surface for the new subfloor of plywood and a crack membrane. Besides, the mud set was going to have to be torn out regardless due to the new plumbing and some cracking. Here’s a picture of the floor as Pavlo was reframing it. It’s not completed in this image, just in progress.
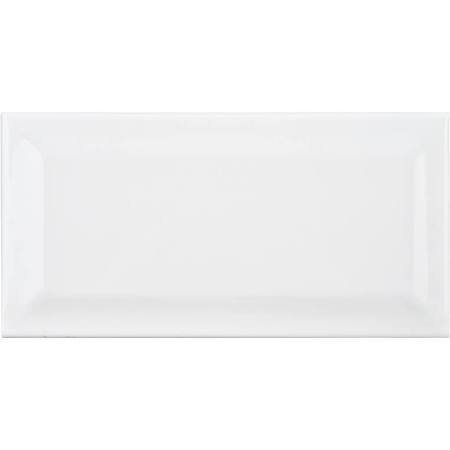
Confused yet? Well, this was followed by cement board on the walls (decoupling membrane was used on the floors as waterproofing) and then we were ready for tile. Tiling is a much simpler thing to explain! Phew! Here’s the selection for the walls:
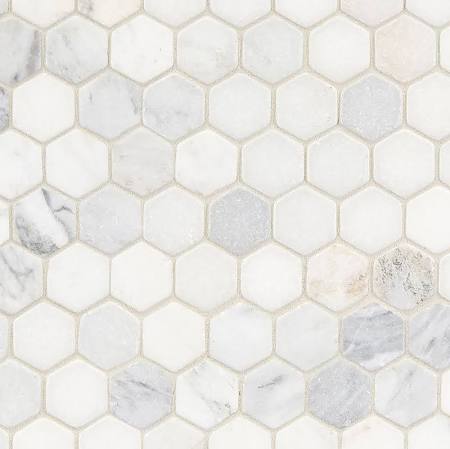
and for the floors:
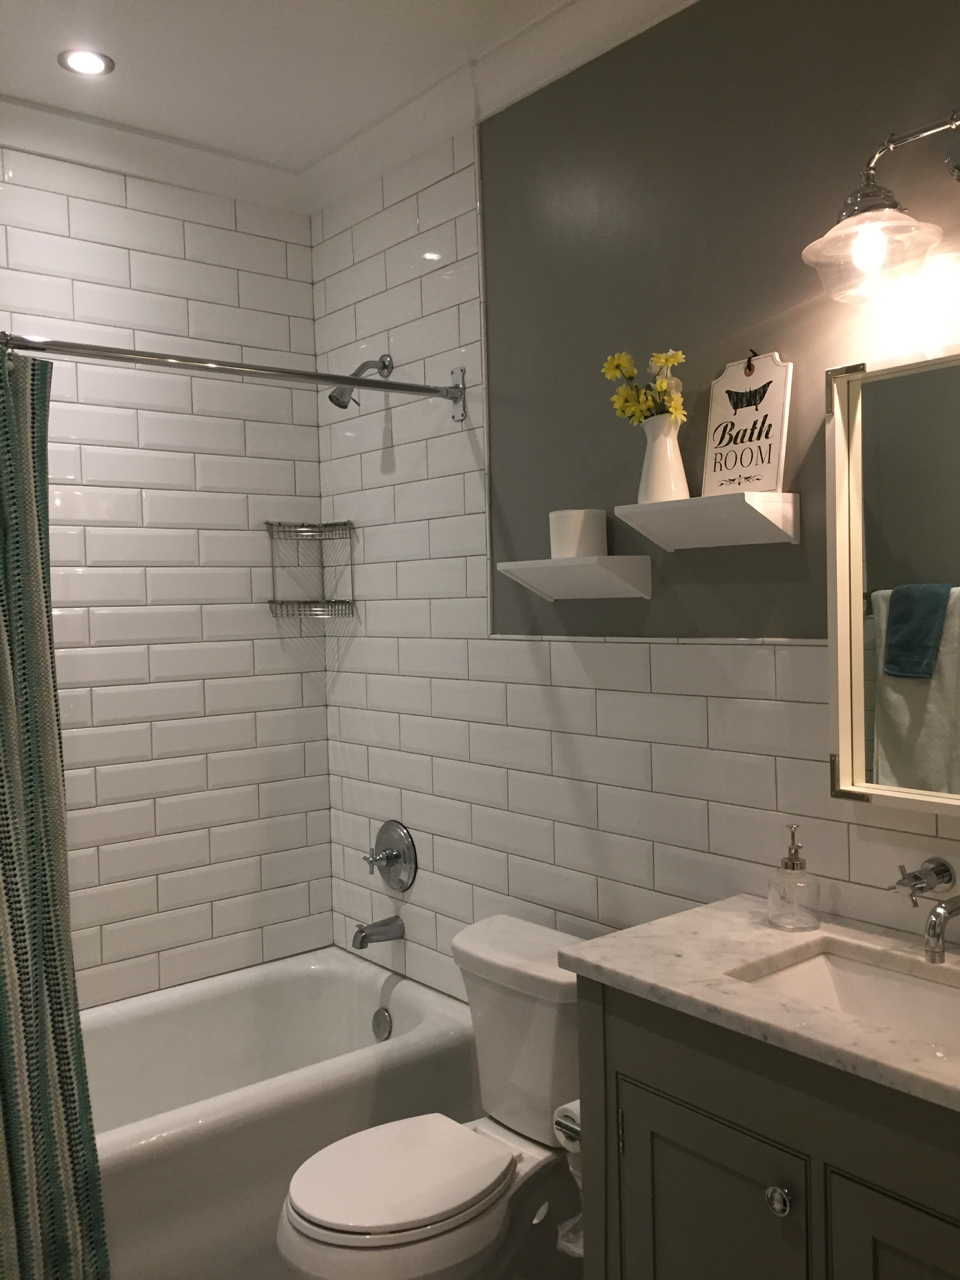
I’ll be back soon with a post on a fully tiled bathroom. I promise, the post is actually almost done! 🙂
Stephanie, I’m so glad to see you posting again! Although I’ve seen your home in different stages, I enjoy seeing and reading the details. God bless you! 🙂