Finally, a Functioning Master Bathroom
My parent’s master bathroom was long overdue for a renovation. Not only was it out of date aesthetically, but one sink had stopped working, the toilet was temperamental and the shower head no longer matched because it had broken the year prior and therefore had to be replaced. It basically got to the point where they could barely use the room!
Unfortunately with our house projects in addition to Pavlo’s full time job having him commute much further these days, I couldn’t commit him to helping me with this project. No, I wasn’t going to do it myself either, that has disaster written all over it! I did, however, design it and we hired a former colleague of Pavlo’s (who now works as a General Contractor) to run the project.
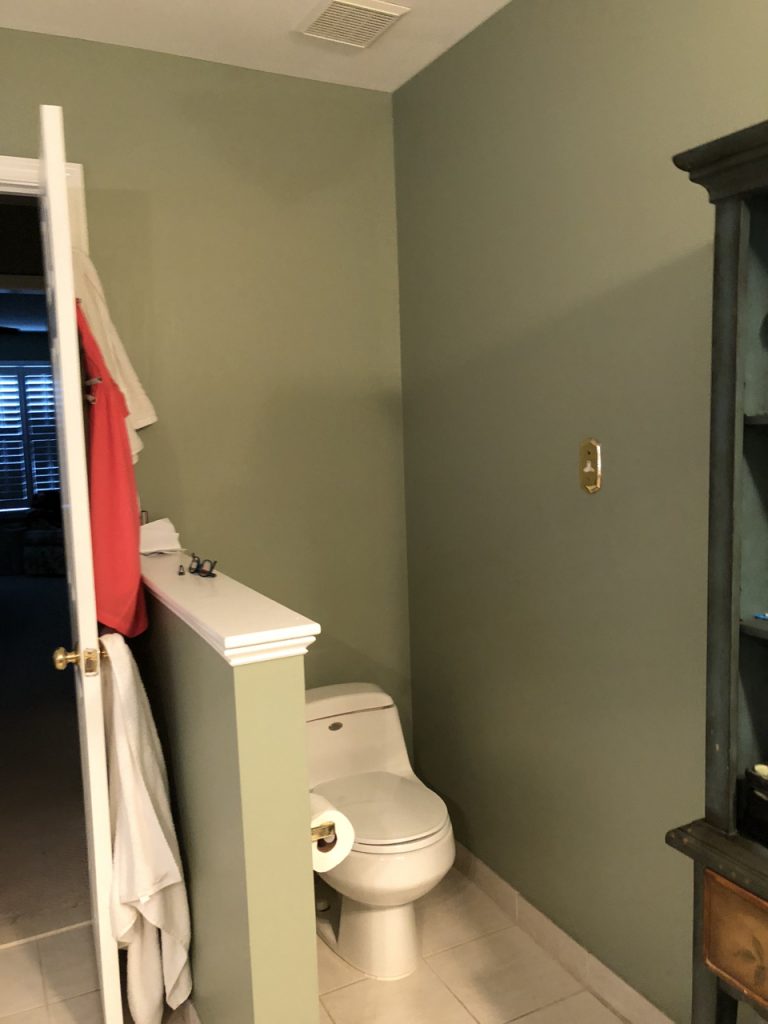
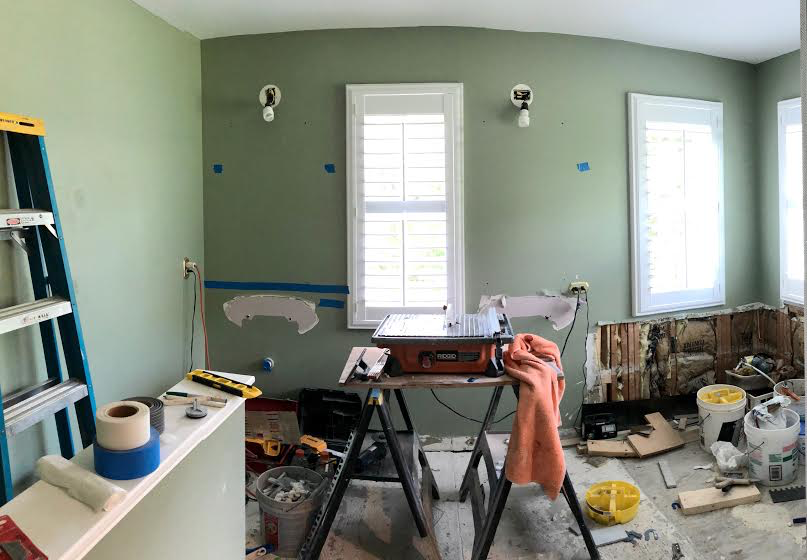
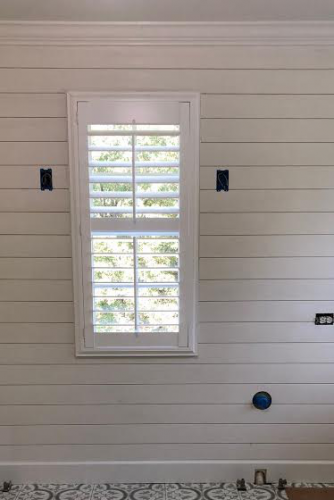
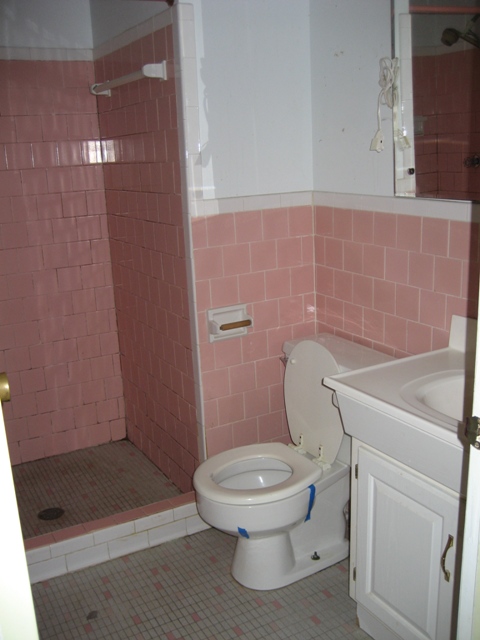
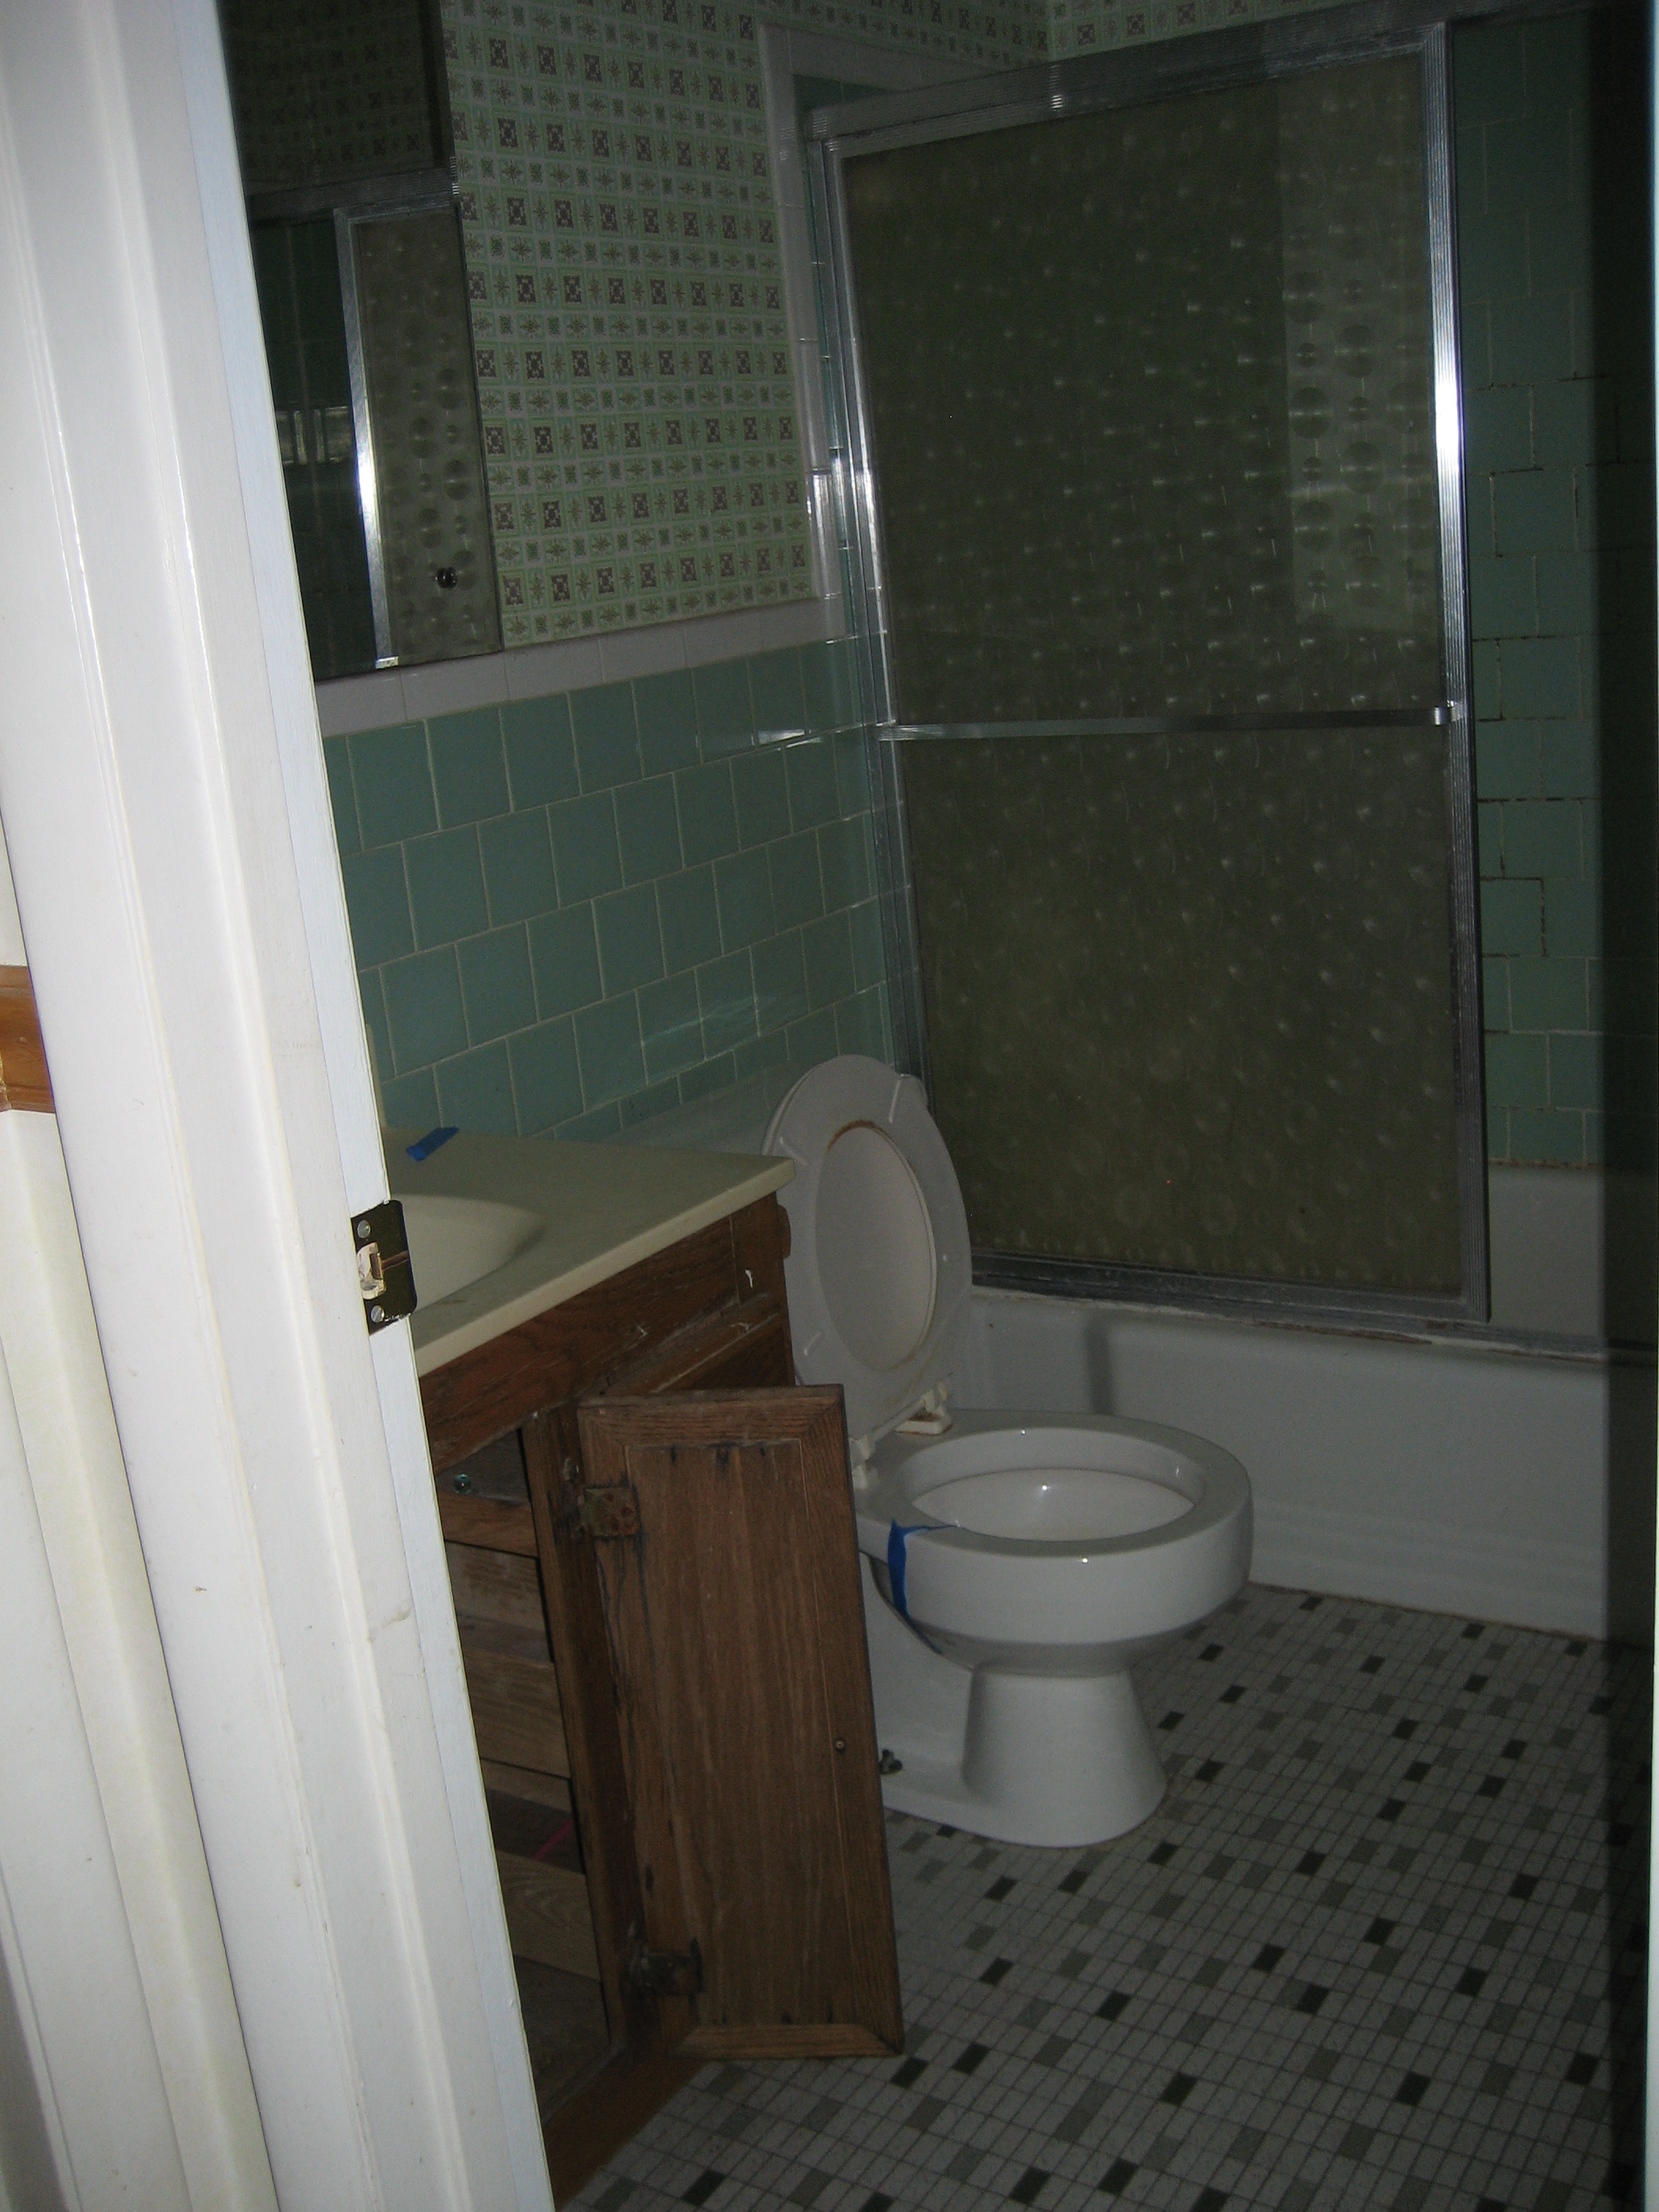
Here are the “before” pictures of the bathroom:
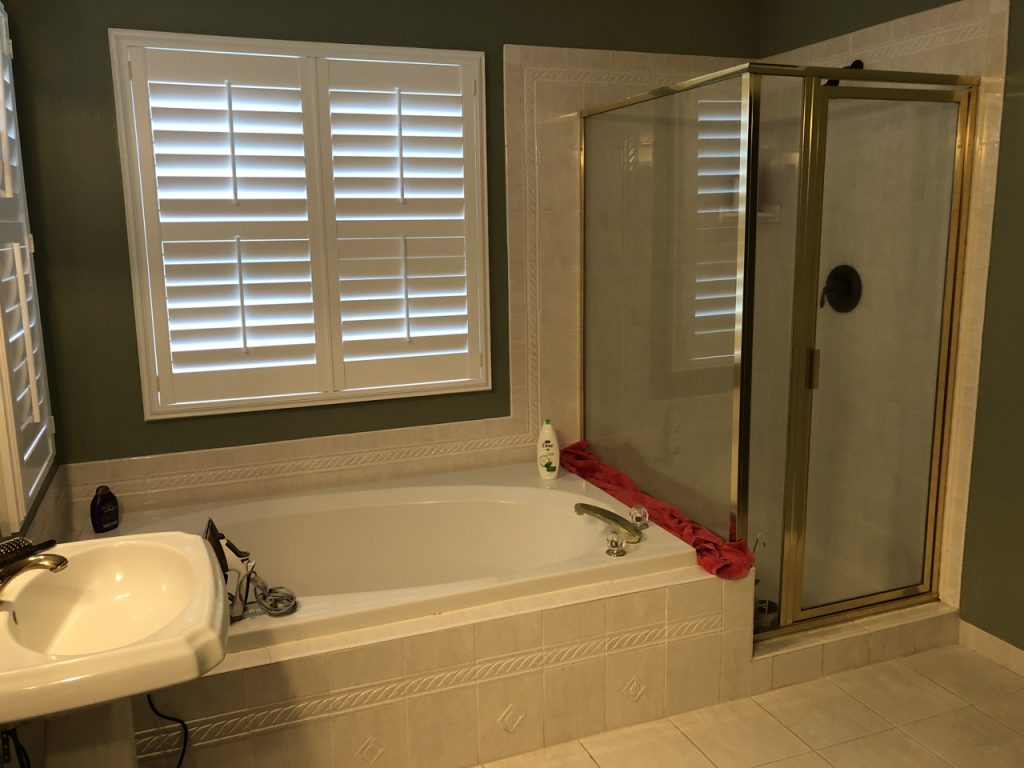
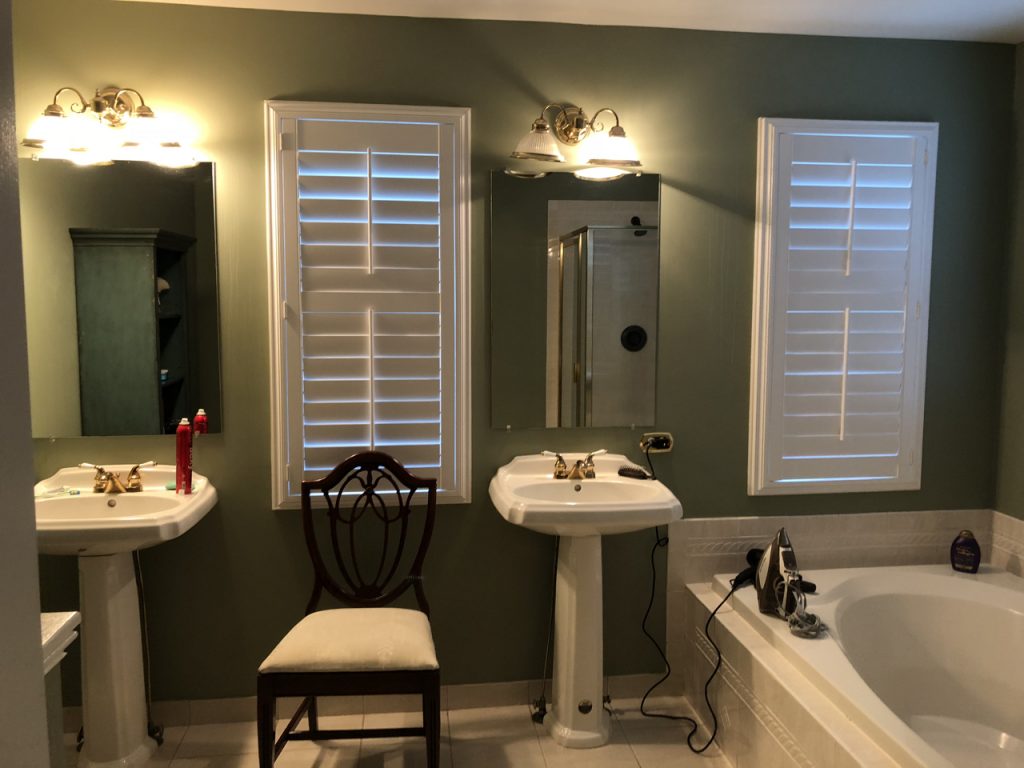
You can see that aside from fixtures literally not working, the lack of storage was also a major issue. Just one piece of furniture and with only one drawer to hide toiletries. Ideally we would have eliminated the tub completely and installed a much larger shower. However, with the window placement in this room that just wasn’t possible. The exterior of the house was recently completely redone with hardie board and stone so ripping any of that apart was absolutely out of the question.
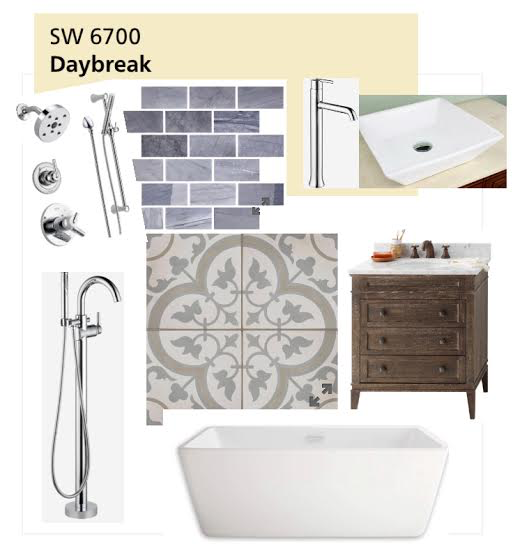
So, our main goals for the new design were to at least increase that shower size by as much as possible and to add much needed storage and counterspace. Here’s the plan:
 As I was ordering materials in an attempt to get them all in on time for the contractor, he started on the demo.
 Post-demo
After that he moved on to adjusting some of the plumbing to accommodate new fixtures as well as building a wall separating the newly expanded shower from the new tub. This was immediately followed by tiling the shower. The field tile is a blueish grey marble called Victoria Grey, which can be found at The Tile Shop. The accent band and the shower floor is Carrera Marble penny tile.
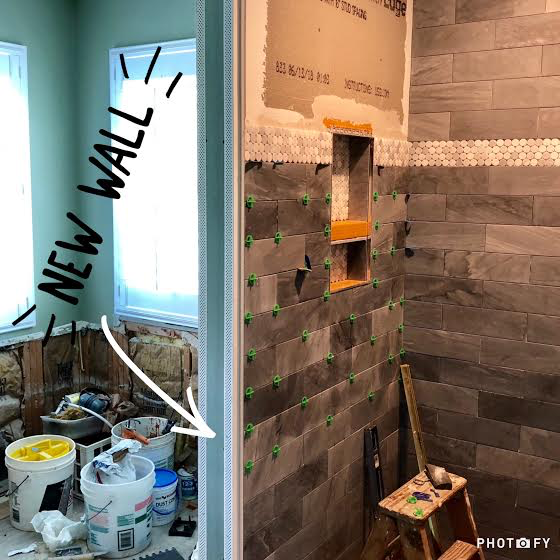 New shower wall built and shower tile started.
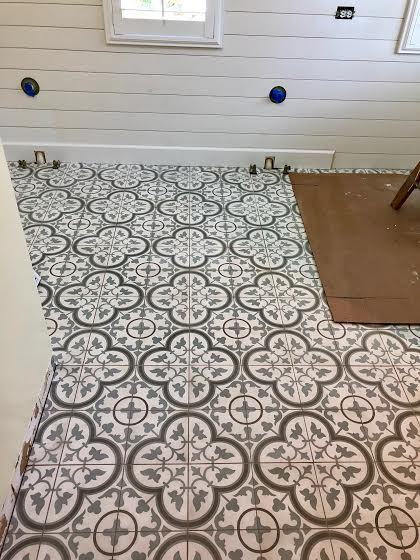
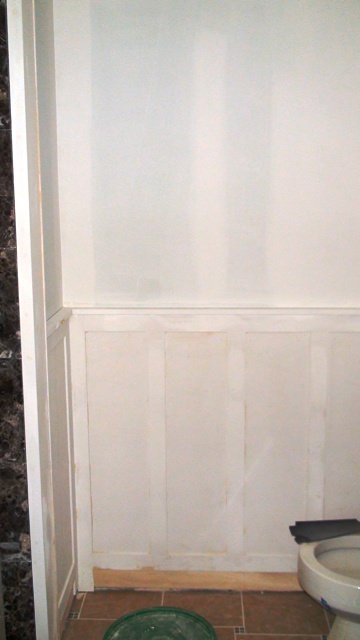
Next our contractor moved on to prepping the walls for paint and ship lap. Doing this before the floor tile is installed helps to limit making a mess of the new floor tiles. We needed to be especially careful in this situation because the floor tiles selected were cement which can stain easily. Ship lap was only installed on the wall behind the vanities but the second it was complete it made such a statement. The rest of the walls were painted a soft yellow, Daybreak by Sherwin Williams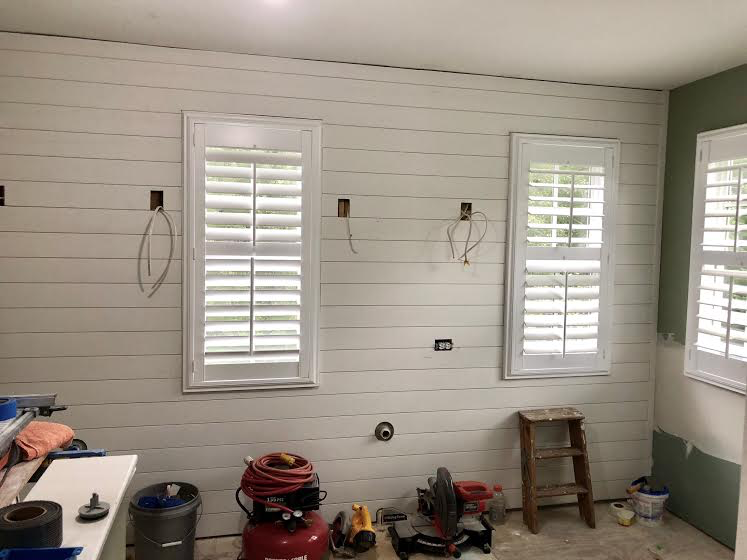
 Ship lap wall after crown moulding was added and it was painted semi-gloss white.
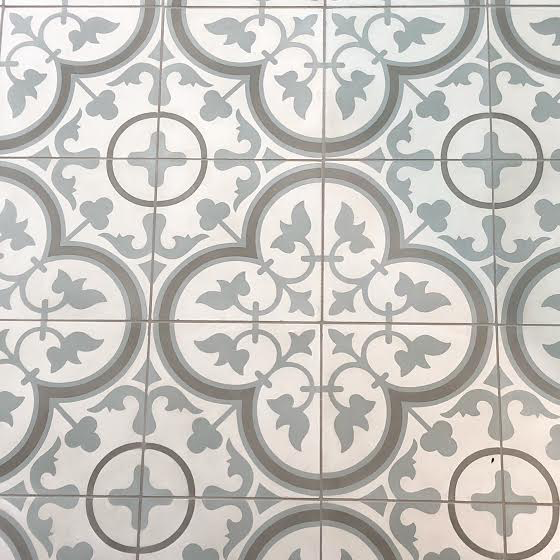
Our contractor was now able to focus on the cement tile floor which turned out to be far more tedious that tiling with stone, ceramic or porcelain. Without going into too much detail, they require being sealed multiple times and took far more precision when lying them since they have nearly perfectly square edges and a pattern. I actually felt quite guilty because they took nearly twice as long to install than other materials. However, they are stunning! (can be purchased at The Tile Shop as well)
 Aside from a few minor issues that required slight and immediate improvisation, we really hadn’t run into anything too dramatic with this project. I consider drama to be something that actually brings a project to a screeching halt. That is until I received a phone call that my vanities were suddenly on a 6 week delay and, to make matters worse, the customer service representative actually advised me to cancel my order. I mean, what customer rep does this? Well, apparently one that has had several issues with this particular manufacturer (this company deals with several). She did say that the quality of their furniture was far from the issue, it just took them forever to get orders to their customers and that she wasn’t even confident that I’d get them in the backorder window they’d promised.
Time wasn’t exactly on my side given we had this contractor for a certain number of weeks, he had already gone over on the schedule because of my tile selection (oh, but remember how pretty they were?) and I really didn’t want to stop the project for weeks until we could get the contractor back. Sooooo, I spent every free moment I had for the next two days searching for new vanities. FINALLY, Restoration Hardware saved the day.
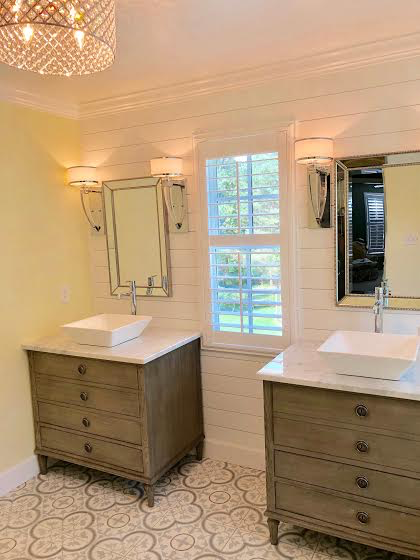
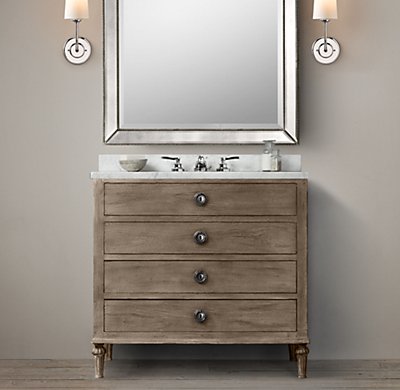 They were delivered right as the floors had been completed, baseboard installed and painted and vanity lights installed. It was also and within a day of the marble company coming to measure for countertops. Perfect timing right? Well, it would have been except the vanities were so deep that didn’t fit through the 24″ bathroom door! It was maybe a quarter of an inch too narrow. I wanted to cry! That evening my brother-in-law removed the door frame in order to get them in so I could see how they looked in place. After all, I had to have them measured the following day and if I hated them then I had to cancel the marble company. I think we all had gotten so use to staring at tiny pedestal sinks that the sight of two large, spacious vanities really threw me off for a couple of days. I absolutely love them. They’re extremely solid and the finish on them is perfect. The warm wood tone with a hint of grey is just what this bathroom needed. It’s a bit difficult to see in the picture below due to lighting and the fact that the plastic is still on them.
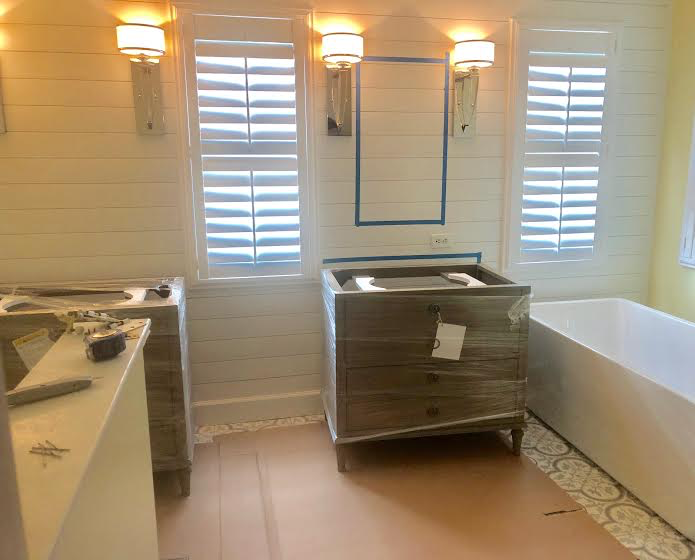 As you can see from the photo above the bathtub was installed just prior to the vanities arriving. This was done merely because it was easier to wiggle the tub into place prior to the right vanity being installed. The day after the vanities arrived things progressed even more with the frameless glass shower door being installed and then two days after that the marble countertops. This allowed our contractor to connect the vessel sinks and faucets along with hanging the mirrors.
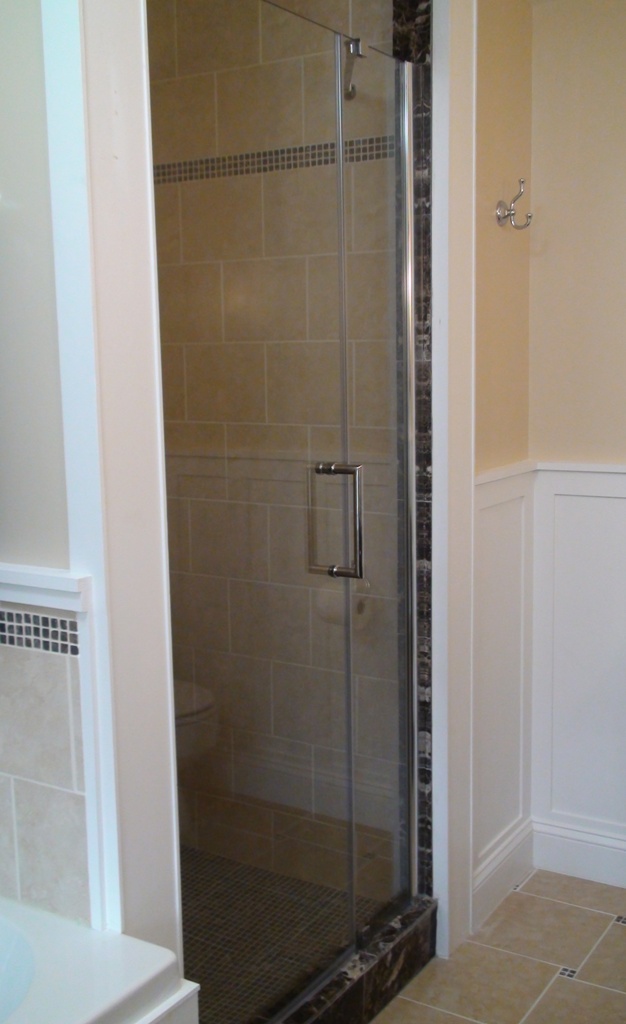
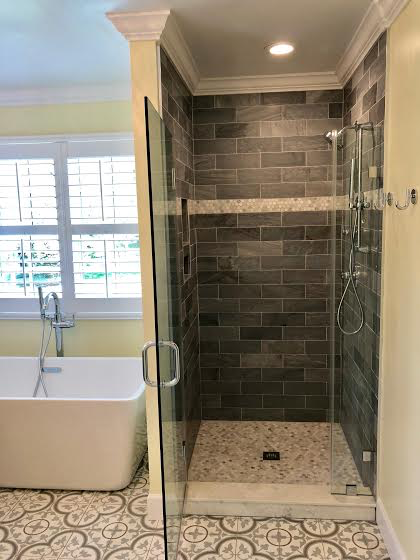 Frameless shower door installed.
Below are the final, post-construction, pictures of the bathroom. Admittedly it still isn’t staged and styled. I mean we haven’t even removed the tape from the shower door or hung towels! That being said it’s still a pretty big transformation. I’ll come back and update this post with new pictures once art and decor are added.
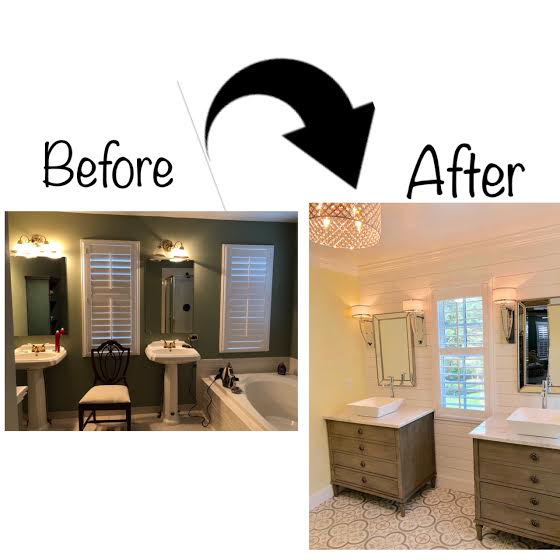
Frameless shower door installed. Before and after of the vanities:
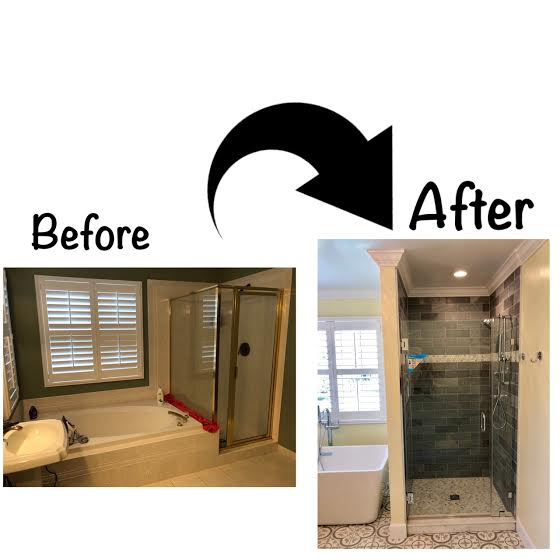
 Before and after of the shower and bathtub:
You do have a fabulous blog thanks. Lark Beltran Lucie
Love it!! Looks amazing!
Having redone or designed 3 bathrooms, I know how difficult this can be. You did a Great job, Looks amazing! Well done!
So true, there will always be bumps along the way. I’m not sure why I’m not use to it by now! 🙂