Countertop Crisis Averted
In case you were wondering what on earth ever happened with my parent’s kitchen/sunroom renovation (more on that here & here), the answer is not much! I would never intentionally leave out a final product! The truth is that in addition to now splitting our time between our house and my parent’s project, we ran into a couple small problems when it came to the countertop for the new opening.


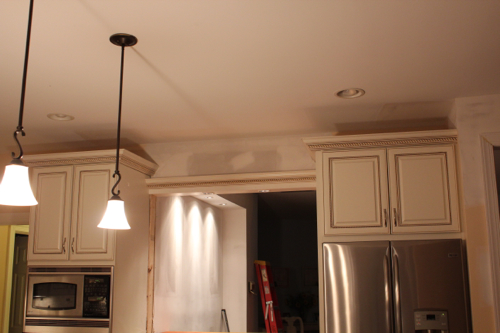
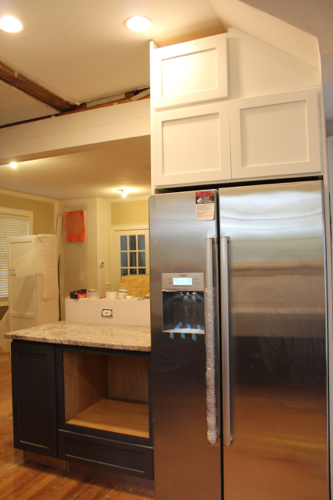
First of all, I should mention that the cabinets that the countertop is going to sit on are actually these upper cabinets (center cabinets in the image below) from before we opened up the wall:

It just made sense to have these cabinets become the base cabinets for our new countertop. Doing this not only allowed us to save money and not waste nice cabinetry, but it was also the right choice from a design perspective because it helped tie the sunroom and the kitchen together even more.
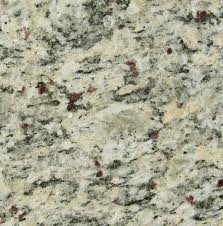
The original plan for the countertop was to get the same granite that was installed in the kitchen. Oh, it sounds soooo easy, doesn’t it? Well, as soon as I saw we were nearing the time for countertop installation I called the same granite company and was given an unexpected and disappointing answer. Apparently, they had stopped digging for that particular brazilian granite (named Giallo Guidoni) and the only slabs left (if anything) would be remnants. The gentlemen that I spoke to at this granite company was kind enough to call other granite yards and I did the same thing with other granite companies at my end. Neither of us had luck and one granite company actually told me they had never heard of Giallo Guidoni! Not a good sign!
After several days worth of many many phone calls and lots of pouting, I decided to go with our backup plan. Actually, let’s just stick with calling it a option #2 because it was definitely just as appealing as using granite, just a little more labor intensive for Pavlo (and our wonderful brother-in-law, Peter who pitched in)!
What was option #2? A wooden countertop…handmade…out of mahogany. My mom and I agreed the reddish tint to the mahogany would be perfect against the cabinets (which had a reddish glaze) and the new backsplash with those amazing brown, glass tiles. (more on the backsplash can be found here)

So, here’s how we Pavlo went about making the wooden countertop.
Step #1: Find and purchase planks of 5/4″ thick mahogany measuring a total of 66″L X 23″ D. This actually turned out to be a little bit more difficult than we’d hoped. There aren’t very many lumber yards nearby and it didn’t seem like they really stocked up on mahogany. In fact, we ended up finding only 3 planks that, fortunately for us, measured about 8″ each so bought all three knowing it would be just barely enough to cover the counter and the overhang. Yup, we got kinda lucky there!
Step #2: Plane the edges of the planks as prep for joining them using a biscuit joiner. My husband worked way too quickly for me to snap pictures of him doing this step. However, here is a diagram and a picture representing exactly what he did:

")
Step #3: After clamping the planks together and letting the wood glue set up over night, the clamps were removed andthe top of the counter was planed and sanded (using an orbital sander).

Step #4: The counter was cut down to fit the space perfectly.
Step #5: One coat of polyurethane was applied.
Really all we were going to have to do at this point was install the counter after the urethane dried…or so we thought. Instead crisis #2 struck after the polyurethane was applied.When we finished the countertop and set it (not installed it) on the cabinets to get an idea of what it was going to look like, and we liked what we saw! That night we literally just set it down, were pleased with it and called it a night. The next day, when the sun came pouring in that room (it is the sunroom after all) I realized that there was a drastic difference in color between the planks. Well, really just one stood out like a sore thumb.


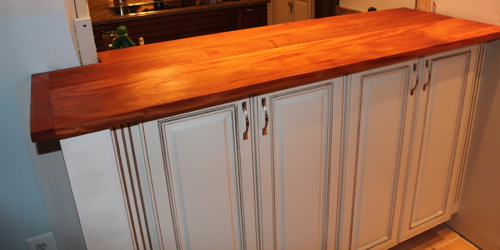
We (Pavlo, my mom and myself) were all in agreement that the one incredibly orange plank had to be cut out and replaced with one that was a closer color match. Pretty much all 5 steps above had to be repeated! We had to find more wood (once again, NOT easy), plane it, join it, let it set, cut it and plane and sand it, then finish it off with polyurethane. The end result of this second attempt at a mahogany countertop was much better! There is still a color differentiation but it’s extremely slight and has a lighter brown and golden tone versus the very orange tone that resulted in the first attempt with the countertop.


It looks really nice. I love the addition of the natural element and think more granite would have actually been a big mistake! Thank goodness they stopped digging for that stone!
With this finally done I hope to work some more on my parent’s sunroom in the coming days. I’ve already gotten the primer and paint so maybe if the kiddos give me a couple of good nap times I’ll get that part finished! Here’s to hoping for some good naps!
Oh yeah! If you need to refresh your memory on my parent’s kitchen you can go:
–Here for the beginning of the project.
–Here on the backsplash installation.
–Here on more details on creating this open concept.
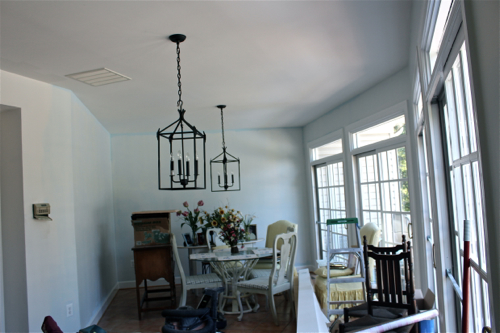
-Or here on our new light fixtures to hang above a new table being built (more on that soon…I hope).
Beautiful!
Fabulous as usual.
Thank you! We’re just gratefully it’s done at this point. Speaking of which, I heard you had finished or were almost finished with your addition? I bet it’s amazing!
Love what you have done.
Haha, glad you approve! I’m thinking I’ll put a paintbrush in Landon’s hands this weekend and make him earn his keep! 🙂