On the 1st Day of Tiling
(Note: title sung to the tune of “The 12 Days of Christmas”…of course)
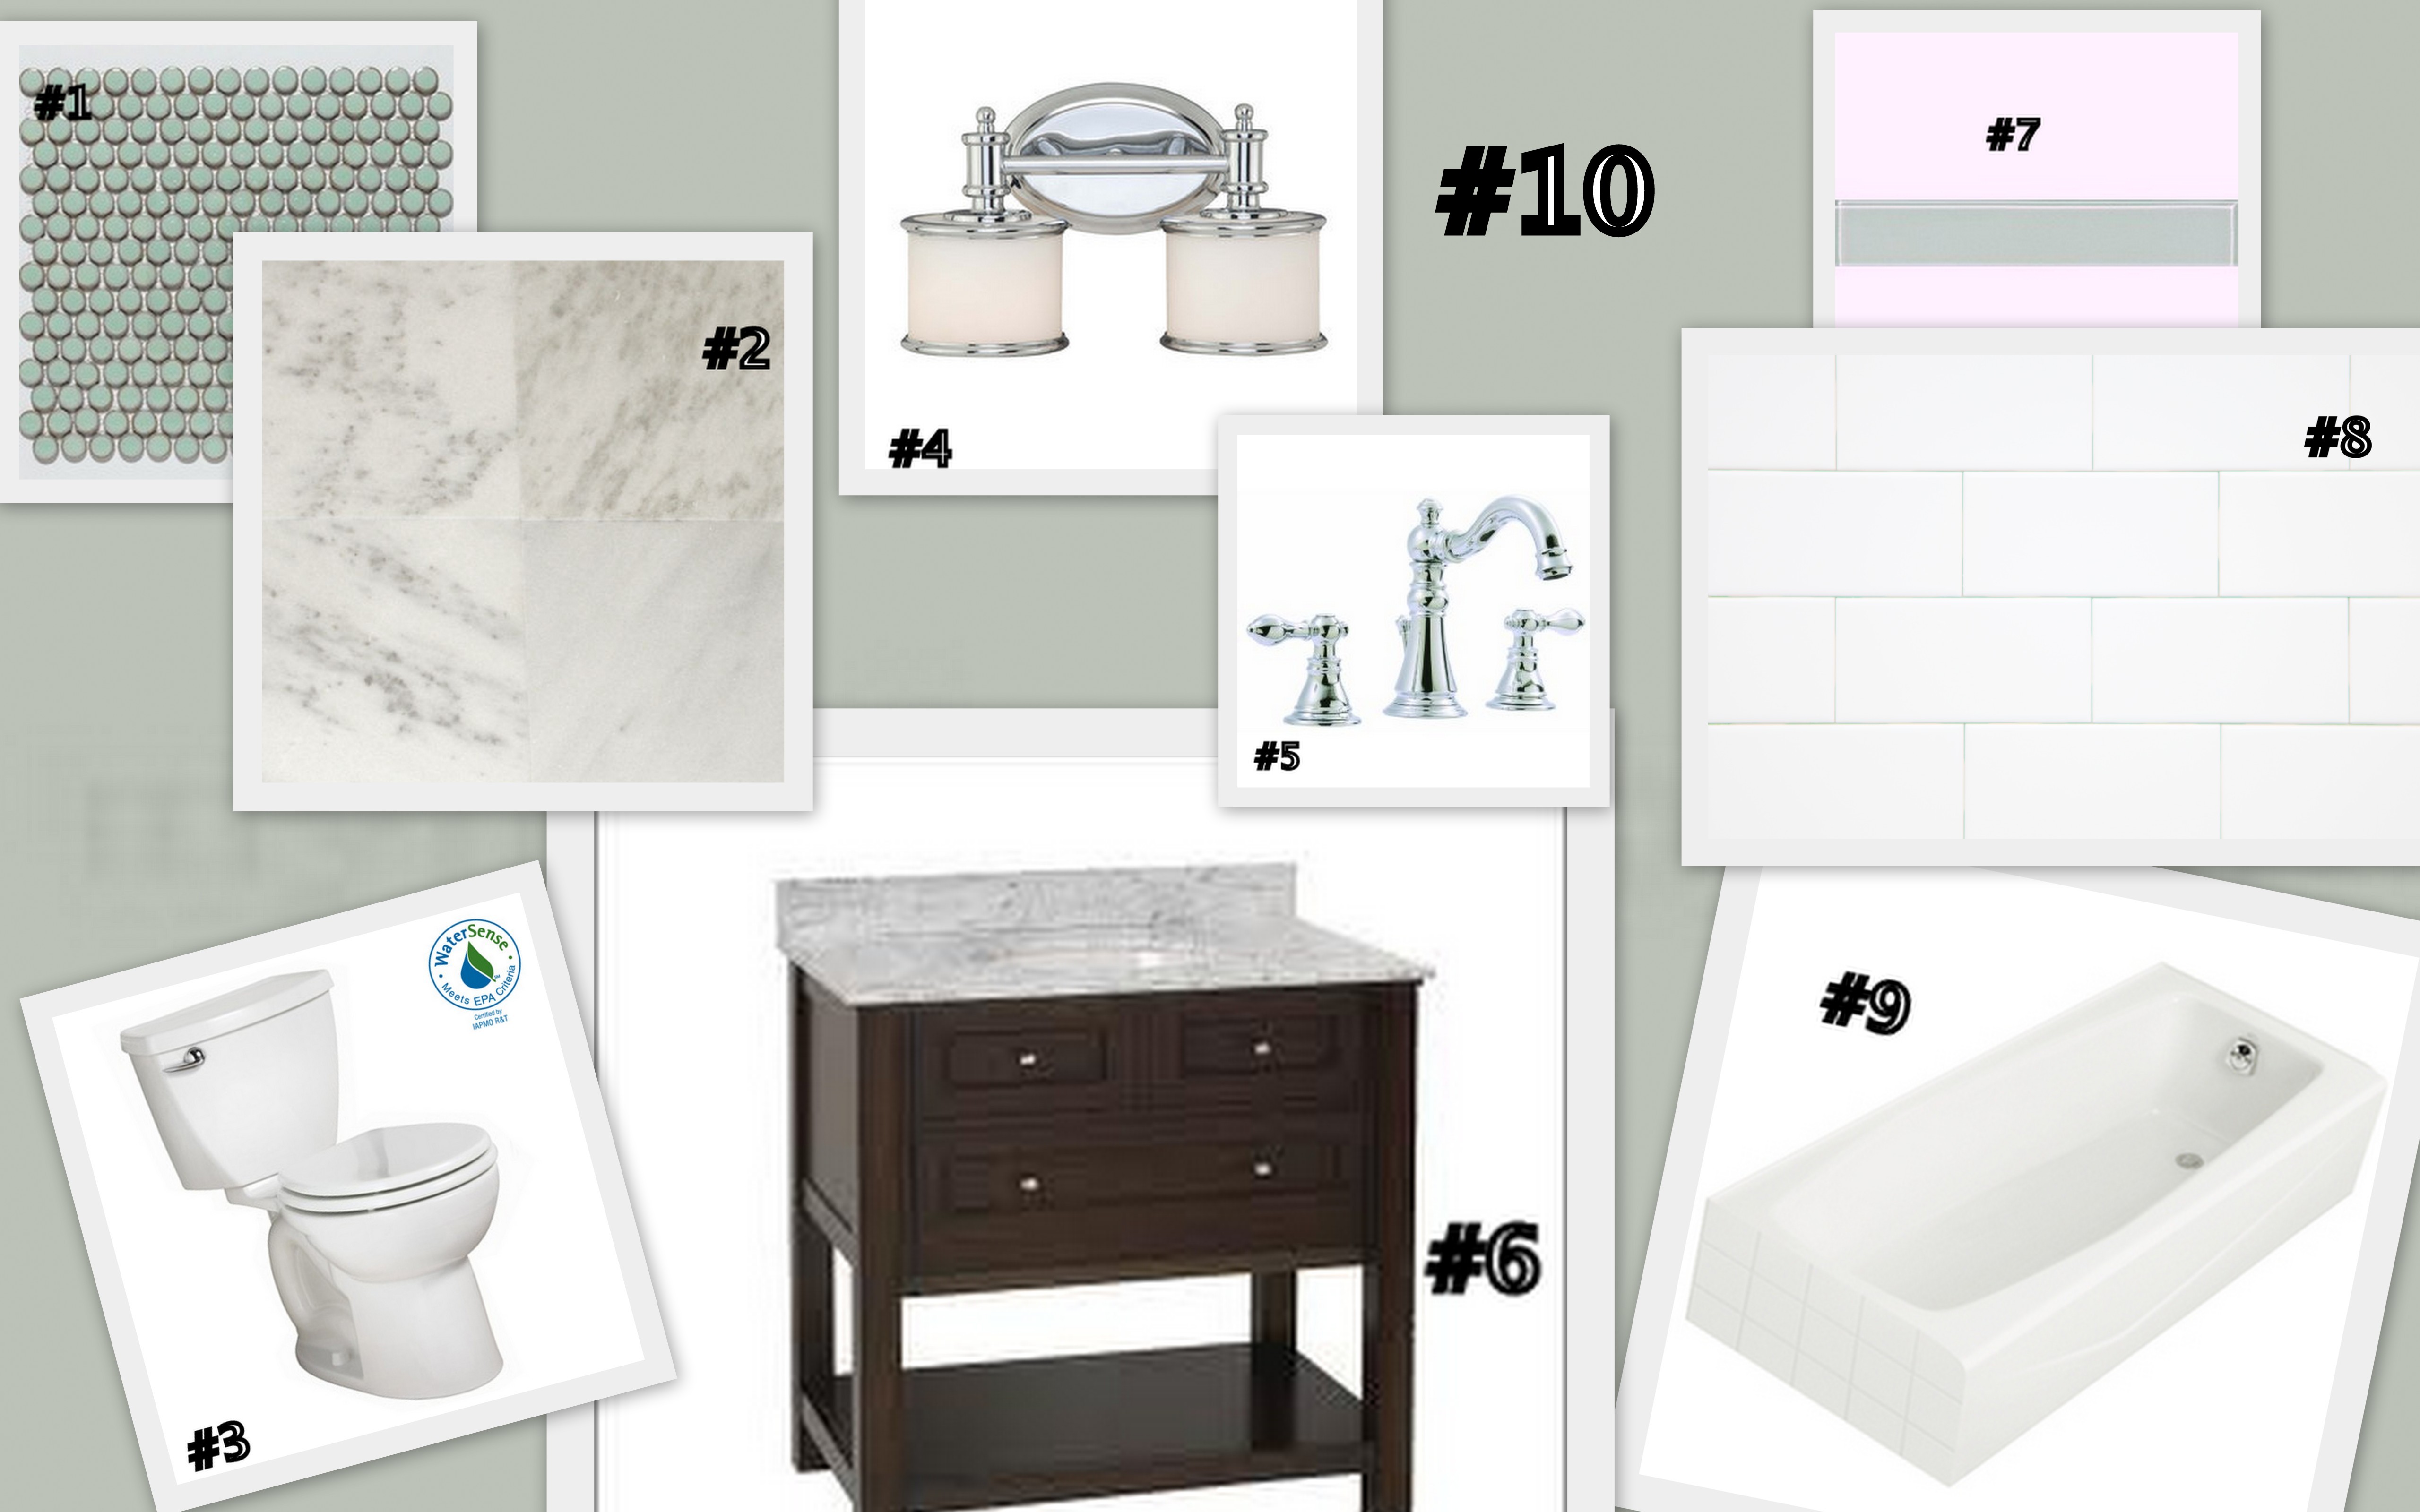
Remember this mood board I put together to give you all an idea of what we hope the finished guest bathroom (well, in our case it will also be the kids’ bathroom) will look like?

While putting together this concept for the bathroom I was careful to keep the age of the house in mind (1936). Pavlo and I are two of the many people in this world that truly appreciate the charm an old has to offer and we’re really going about this renovation trying to maintain that charm in any way possible.
In the late 19th & early 20th century a design trend in bathrooms came about that has now been deemed timeless and traditional. What trend was that you ask? Well, the black and white themed bathroom of course! I’m sure you all know exactly what I’m talking about, but just for kicks here are a few examples of this style:


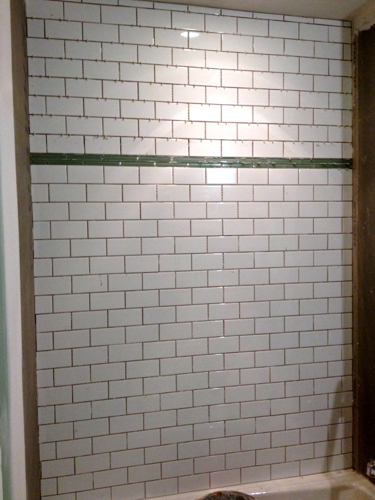
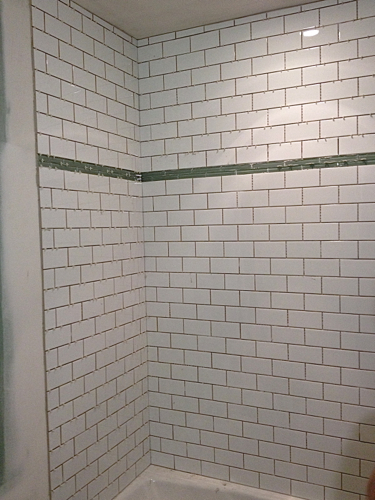
 As you can see from the pictures, many people who already have this tile work in their bathrooms often keep it and merely update it with paint and new fixtures. It’s such a popular and classic look that many people renovate their bathrooms to replicate it no matter the age of the house! No, I personally didn’t necessarily want to replicate the exact black and white theme, even if it was appropriate for the age of our house. However, I did want to use it with a modern twist for a more updated look. In order to achieve this for the shower surround I decided to stick with the traditional white ceramic subway tile but instead of using black accent tiles I chose to use green glass tiles.

Day one of tiling was about three hours worth of tiling the larger of the three walls in the shower surround. Here are some progression photos from that evening:

Normally the first step would be to check to make sure the tub was level and if it wasn’t then you would have to use a ledger board approximately two tile rows up (basically skip two rows of tile and install a level ledger board). This would ensure the tiles are set evenly and there wont be any slanting along the rows. In our case Pavlo had personally installed the bathtub and at that time ensured it was level. We did double check just before tiling and, thankfully, it was still level! This meant our first step was to find the center of the wall where the center of the first subway tile would line up. I actually stepped out of the bathroom when Pavlo did this sooooo I didn’t get a picture.
Next came the mixing of the thinset:
 Followed immediately by spreading it on the wall with a trowel and then tiling. After about 45 minutes we had this:

Another 45 minutes later we had this:

And yet another 30 minutes later we had this and we were ready for the glass accent tiles:

The green, glass accent tiles were also set in a subway pattern. Any cuts they needed couldn’t be made with the wet saw (like the white ceramic tile could) and instead we had to use this handy little glass cutter:

Pavlo would score the tile in the spot where it needed to be cut by scraping it with the tile cutter multiple times in the exact same spot.

Then, with the help of some pliers, he would snap the tile apart leaving us with a clean cut every time.

We couldn’t help but do just one more row of the white tile after the accent band went up. We really just wanted to leave that evening having gotten at least a taste of what the final product would look like:

The results after day #1:

Yes, we quit when we were that close to finishing the whole wall. It was late, we were really tired and decided it was better to stop, go kiss our kids goodnight and prevent any possible sloppy mistakes. Besides, we only got that far because we were both so incredibly anxious to see what the accent band was going to look like! Once we finally got to that point we felt enough satisfaction to call it a night! Yup, we were definitely pleased after day one!
Be back with updates on day two of tiling soon! Also, I plan on posting a “how to” tutorial on tiling. Yes, I’m one of those who has many plans and ideas and almost daily finds my plate incredibly too full! Hey, it’s better than being bored! Anyways, it’s something that really looks more difficult than it truly is and something that most (if not all) homeowners can definitely do themselves.
Ok, off to work on our “On The 2nd Day of Tiling” post followed by making our annual Christmas cards. Let me tell ya, it’s been tough to compete with last year’s card!

You guys are so talented! If Pavlo needs a job (LOL), we have a small bathroom we would pay him to redo. He could probably knock it out in 2 weekends!