The Before Tour
Since we purchased the house a while ago, it’s only appropriate to update everyone first. The house is a 1963 split level that had five bedrooms and two and a half bathrooms at the time of purchase. The exterior was a white and blue faux Tudor style on the front, with clapboard siding on the remaining three sides. Although the house had “good bones,” I’ll admit that at purchase it was, well, a wreck. There was so much to do that I had no clue where to start. Lucky for us Pavlo did!
Both the interior and the exterior of the house have already undergone such drastic changes that words alone can’t describe them…don’t worry we have pictures! With so much completed I figure the easiest way to get everyone up to speed is by first giving you a tour of our house just after purchase.
The Exterior (The Front):

As you can see, the front exterior of our house was in desperate need of a makeover. Our basic vision for it included replacing the faux tudor facade with siding that matched the rest of the house, a fresh coat of paint, bold colored shutters and a brand new stained front door. Oh yes, we can’t forget the massive amount of landscaping needed to truly have our vision become reality!
The Exterior (The Back):
Unfortunately, the backyard needed just as much TLC as the front. However, we were really excited to get started on it because it held so much potential to become an incredible spot to entertain or to just hang out. As you can see from the picture below, we had a lot of work to do in order to achieve the amazing outdoor room we pictured.

The Interior:
The Kitchen
Now for the fun part, touring the inside of this wreck! When you first walk into the home you’re standing in the kitchen so it only seems appropriate that we begin our interior tour there.

I’m not going to lie, the kitchen had to be gutted! We were definitely going to have to do all the basics like, installing new cabinets, new appliances and granite…but those changes would just be the tip of this iceberg! Now, that’s not to say that this kitchen didn’t have some good attributes. It was a large, eat-in kitchen with one huge (albeit old) window and a great skylight. Despite these wonderful things it was a very closed off space that came across incredibly dark and dreary (yes, even with all the wonderful windows). Most people love open concept floor plans and this was far from that!
Below are pictures of either side of the kitchen as you stand looking directly through it to the dining area.


The Living Room
There wasn’t much to complain about when it came to the living room. It was a large space with hardwood floors and LOTS of light from yet another very old window. However, it was closed off from the kitchen and as I just mentioned, we really wanted an open floor plan. One of the walls that separated the kitchen and living room was going to have to be removed in order to achieve our dream layout.

Dining Room(Area)
Our house doesn’t have a separate, well defined dining room but it does have a dining area that is directly off the kitchen. As can be seen in the image above, there is just enough space for a dining room table and maybe a hutch. The area is ideal for when guests come over because it is located right between the kitchen and living room making our entire main floor a great room.
Bedrooms:
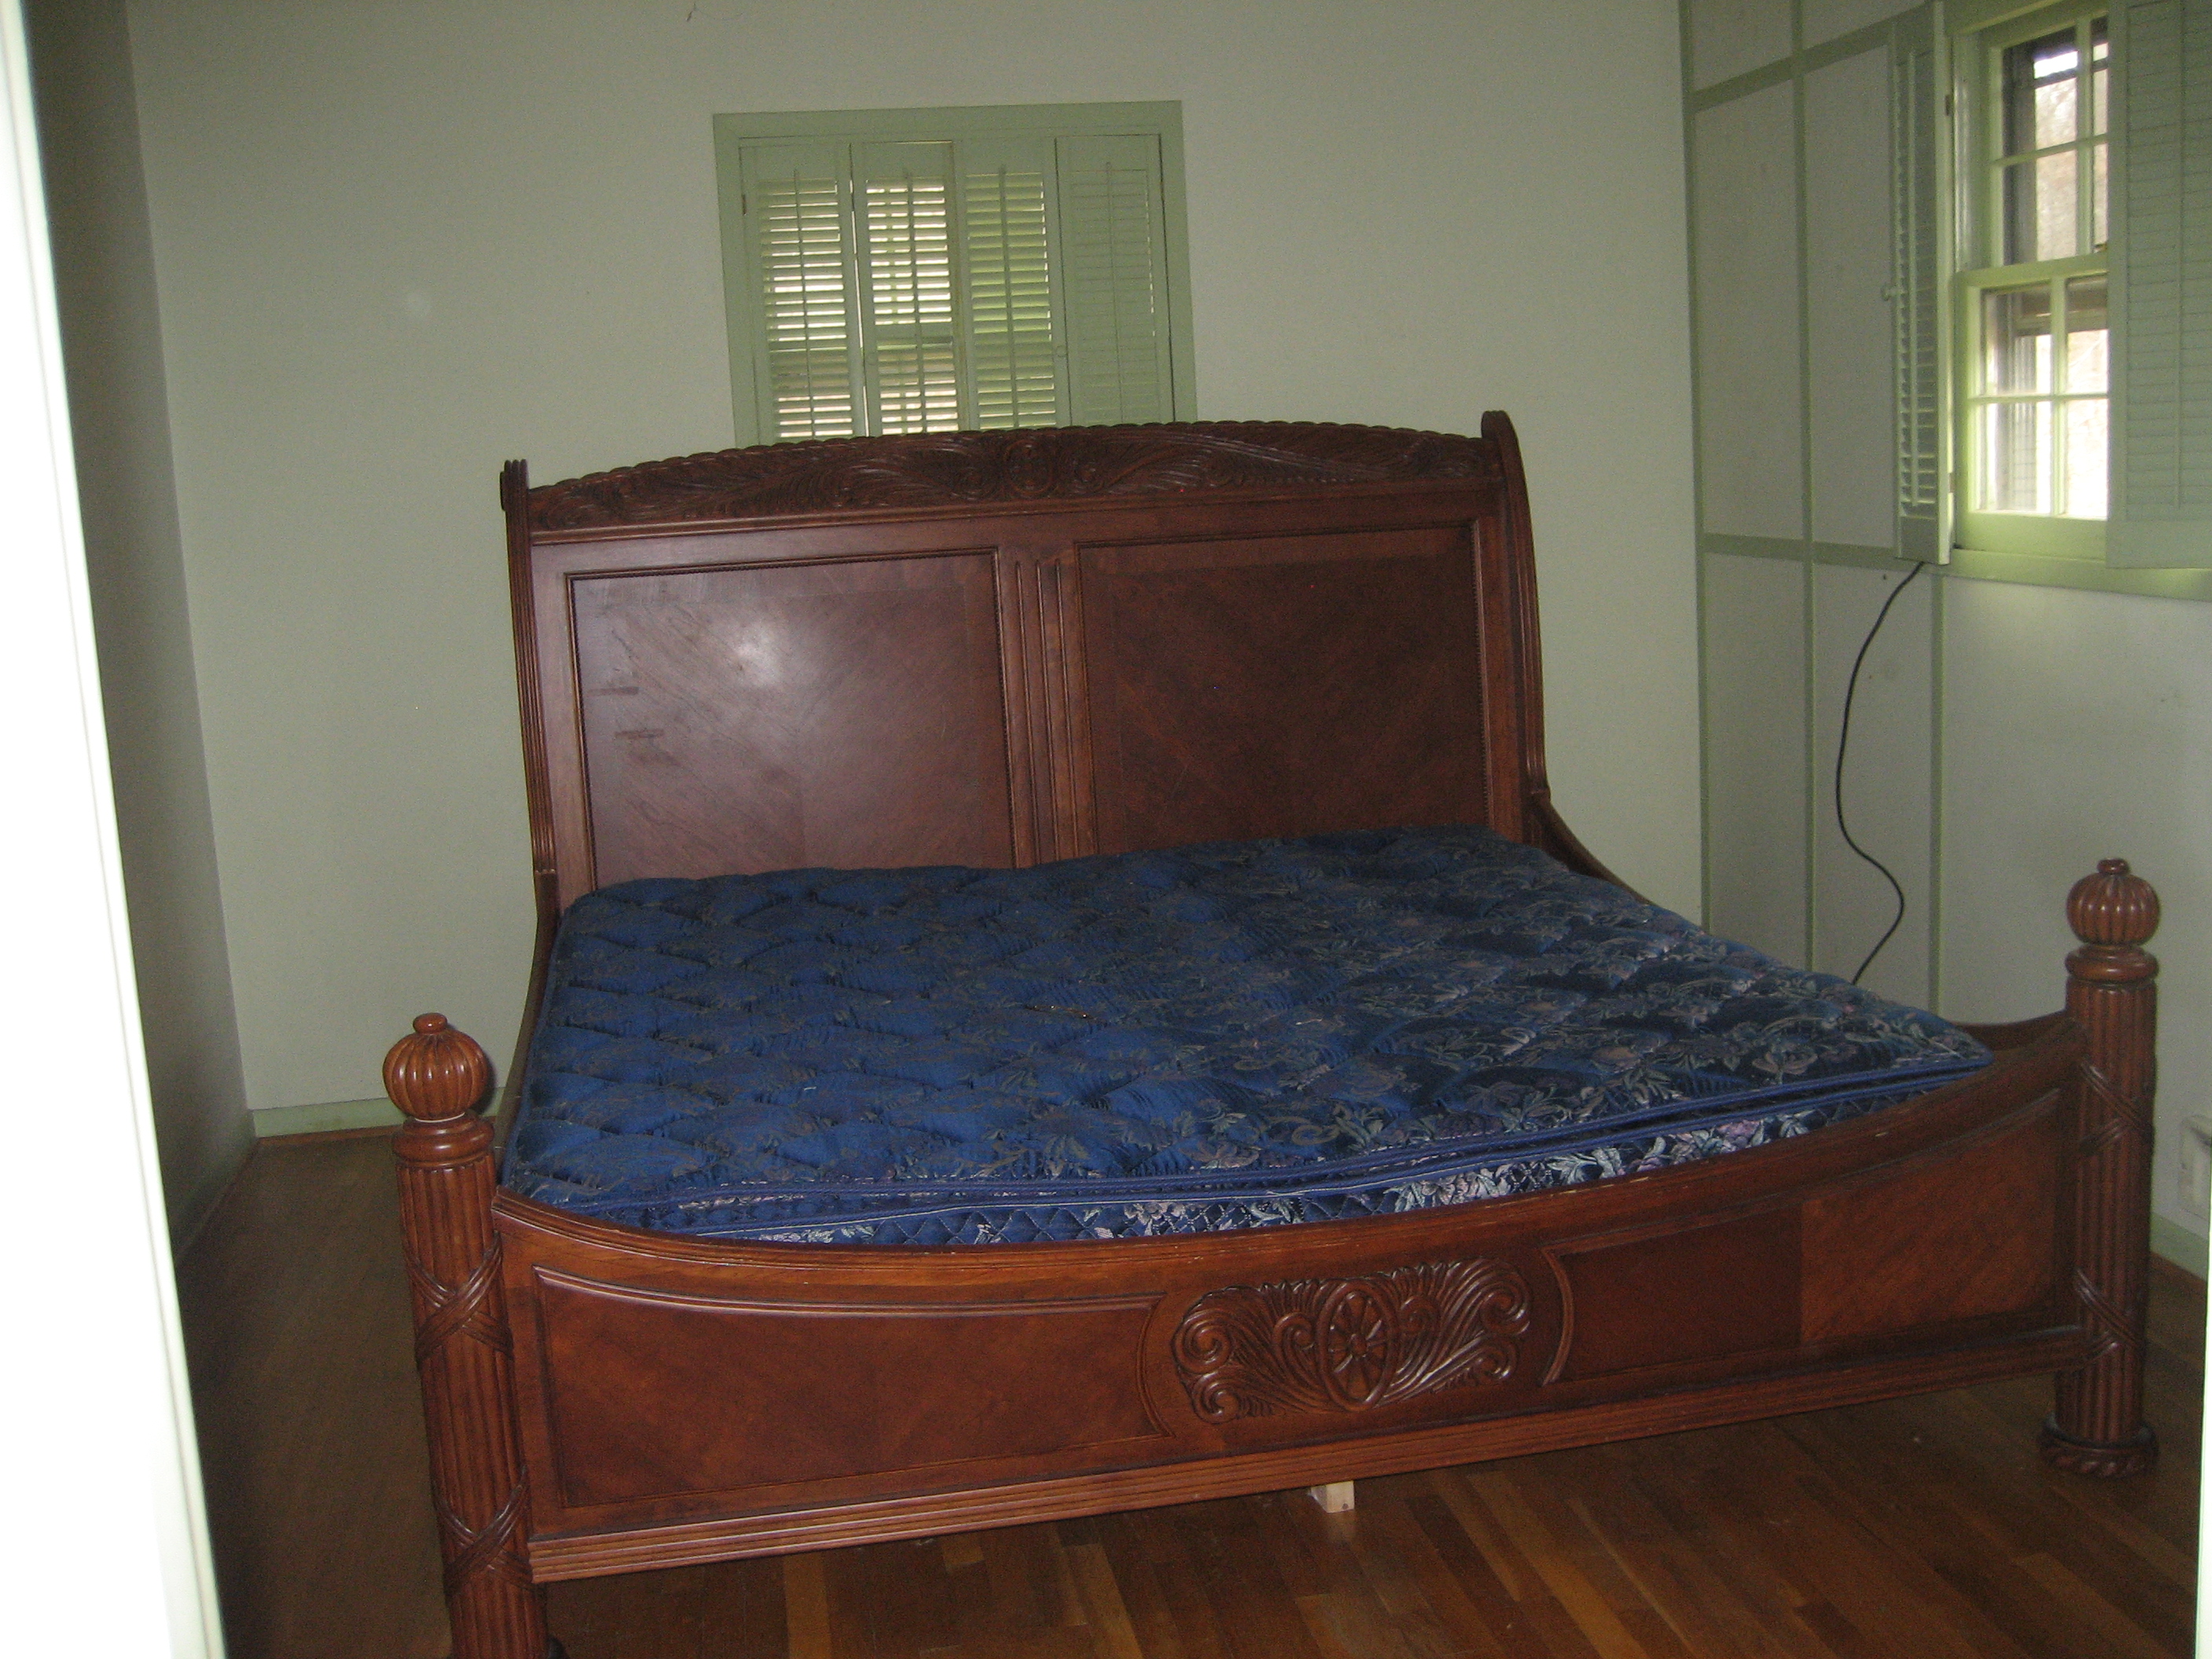
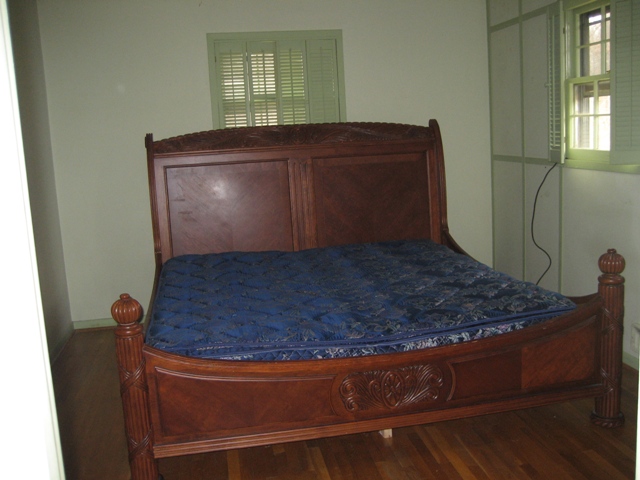
The original layout of the house had five bedrooms and two and a half baths. Four bedrooms were on the upper floor and the fifth was in the basement. Since the four upstairs bedrooms were smaller we decided to eliminate a wall separating the master bedroom from the adjoining guest bedroom. This may have eliminated a room but provided us with one large master suite, something that was greatly needed!
Below is a picture of the master bedroom at the time of purchase (no, the bed is not ours and was thrown out immediately). As you can see it was tiny! The wall on the left side of the image was brought down during demolition nearly doubling the size of the room. You’ll just have to stay tuned for a post on that transformation though!

As mentioned above the house originally had two and a half bathrooms. There was an extremely small master bathroom with just one vanity, a toilet and a shower stall.

The second bathroom (seen below) on the upper floor was the perfect size for a guest bathroom but as you can see it too needed some SERIOUS updating!

Finally, below is a shot of our third bathroom which is located in our basement. As you can see it was a half bathroom but because of the bedroom also located in the basement we felt that for guests it should be made into a full bath. With that plans for a shower stall went underway!

Basement:
As mentioned above in the “bathrooms” section of this post, our basement already had a bathroom and a bedroom in addition to a living area. The living area was supposed to be a large open space with a fireplace for socializing and relaxing. However, the previous owners clearly didn’t feel the need to use it in this way. They had put up flimsy temporary walls (painted a hideous shade of pink) in an attempt to make more bedrooms.
This can be seen in the image to the below which is a shot of the side of the basement with the steps going upstairs. The “wall” on the right side of the picture is one of the temporary ones I mentioned. It separates the side of the basement with the steps from the side with the fireplace, thus creating two rooms.

When we first walked the house we were really excited to see there was a wood burning fireplace. Unfortunately it had been severely neglected. It was boarded up and had clearly not been cleaned in at least a decade. Yup, it was gross to say the very least.

Our goal for this basement was to make it the comfortable living space it was always meant to be. Just by looking at these pictures you can tell we had our hands full!
Laundry room/Storage room:
If you thought the basement was bad then you might just want to avoid looking at pictures of our laundry room! Just realize, you’ve been warned!
To be clear this space is technically a laundry room since it is where we do laundry,
however, I like to call it the dungeon! It’s a small, unfinished room located in back of the basement that’s home to not just the washer and dryer but all of Pavlo’s tools, supplies and building materials. To be quite honest the space holds a lot of potential and with a little bit of paint, some added lighting and a new counter top, this room could be transformed into a dream room for Pavlo’s tools and for doing laundry…that is if a dream room for doing laundry must exist!


Well, that’s the end of the before tour! The following posts shouldn’t be nearly as horrifying. Check back with us very soon and see how we transformed this house of horror beginning with the kitchen!

Yuck! You all must have had a vision of what it could be.
WOW! I don’t think words can express how impressed I am with you guys (and Landon too)! I only saw the house when it was just about done and had I seen the pictures first I wouldn’t have thought it was possible to make it into the awesome home you have. Nicely done guys, it’s really really really really amazing :). Lots of love to ALL of you 🙂 Even the peanut 🙂