The Steps
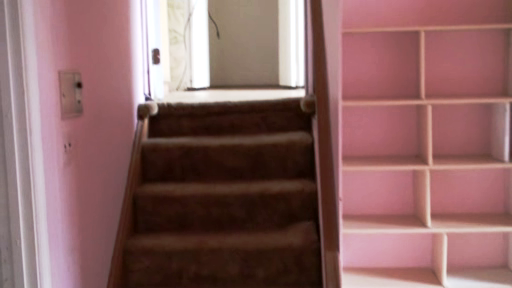
As mentioned in the previous post, the steps heading down to the basement needed just as much TLC as the rest of the basement. Actually, I should rephrase that and say that the steps of the house in general, were in need of some TLC. Initially the steps going upstairs were not carpeted like the ones heading to the basement.

Fortunately, beneath that carpet was hardwood flooring which we had refinished in a red oak stain along with the rest of the floors of the house. We chose not to have the risers of the steps refinished and rather painted them a crisp semi-gloss white. We felt this gave the steps a cleaner, more updated look.

The steps heading to our upstairs didn’t require balusters, just a new handrail, which would be stained to match the floors and attached to the wall using railing brackets.


The steps heading down to the basement did in fact need balusters in addition to a new railing and a newel post at the bottom. The railing for the basement steps was made the same way as the railing heading upstairs. We purchased an unfinished railing and stained it to match the floor. However, this railing, unlike the one heading upstairs, couldn’t be attached directly to the wall and instead had to be attached on the left side of the stairway which was open to the room. The balusters were made of simple 1″ by 1″ pieces of wood cut down to their appropriate lengths and painted semi-gloss white to match the risers and trim.

The final touch to our stairway was the newel post at the bottom of the basement steps. In another effort to be economical, Pavlo actually built our newel post from scrap pieces of wood and trim leftover from other household projects. He first built a plywood box for the newel support and then covered the plywood with four paneled sides using the same construction as he had for the paneling above the fireplace. He then capped the top with a two pieces of poplar and a little bit of trim for both the top and bottom.

After Photos:


Here are before and after shots of the two stairways taken from the living room: