The Great Floor Debate
In our initial plan (and budget) for the laundry room, Pavlo and I had decided that it would be best to simply paint the laundry room floor with a durable epoxy paint rather than finish it out with another type of flooring like tile or rubber flooring (which, I still think would be amazing in a laundry room).
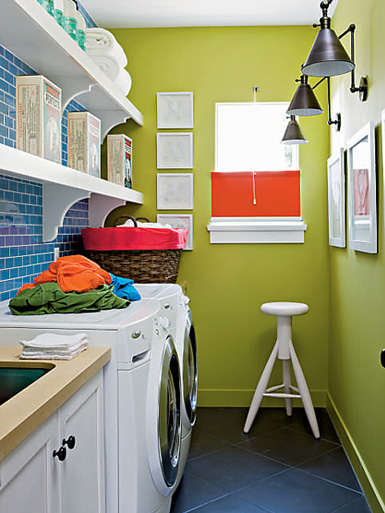
Here’s an example of an amazing, tiled laundry room (the awesome lighting doesn’t hurt either!)

And here’s an example of a Sarah Richardson designed laundry room with rubber flooring. Since the flooring is a little bit difficult to see, below this image is a close up of the rubber flooring…only it’s not a pretty blue!


Our laundry room certainly doesn’t look as nice as either of the above…yet! However, it’s definitely getting closer now that Pavlo convinced me to reconsider the whole “just painting” plan we had. I know I know, I’m the girl and I should be the one convincing my husband to spend more money, not the other way around. When this happens in our marriage I usually can find away to prove to Pavlo that he’s just wasting time and/or money, this time I couldn’t! Pavlo had just found WAY too good of a deal on 2′ by 1′ porcelain tile AND he even recruited help to lay the tile! I must admit that I was pretty impressed with his ambition to get tile floors!
Since it’s been soooo long you probably don’t even remember that the ceiling was painted grey

and the walls were blue with the white trim.

Well, Pavlo really got lucky when he not only found an amazing deal on tiles but when he told me they were grey tiles, I was sold.
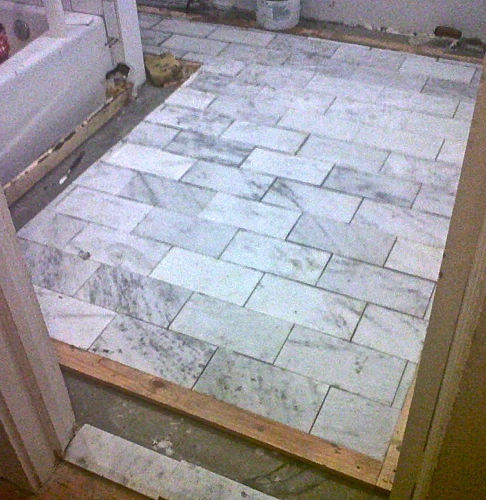
Here is a picture of the floor in the process of being laid


Then, once all of the tiles were set we had two long boring evenings of scraping thin set and grout lines then cleaning the tiles as preparation for grout. But it was all worth it when the finished product was revealed after one evening of grouting.


At this point it just needed to be de-hazed and given a good clean. In the next post I’ll get more into that process along with the finishing touches to our now usable laundry (and storage) space.