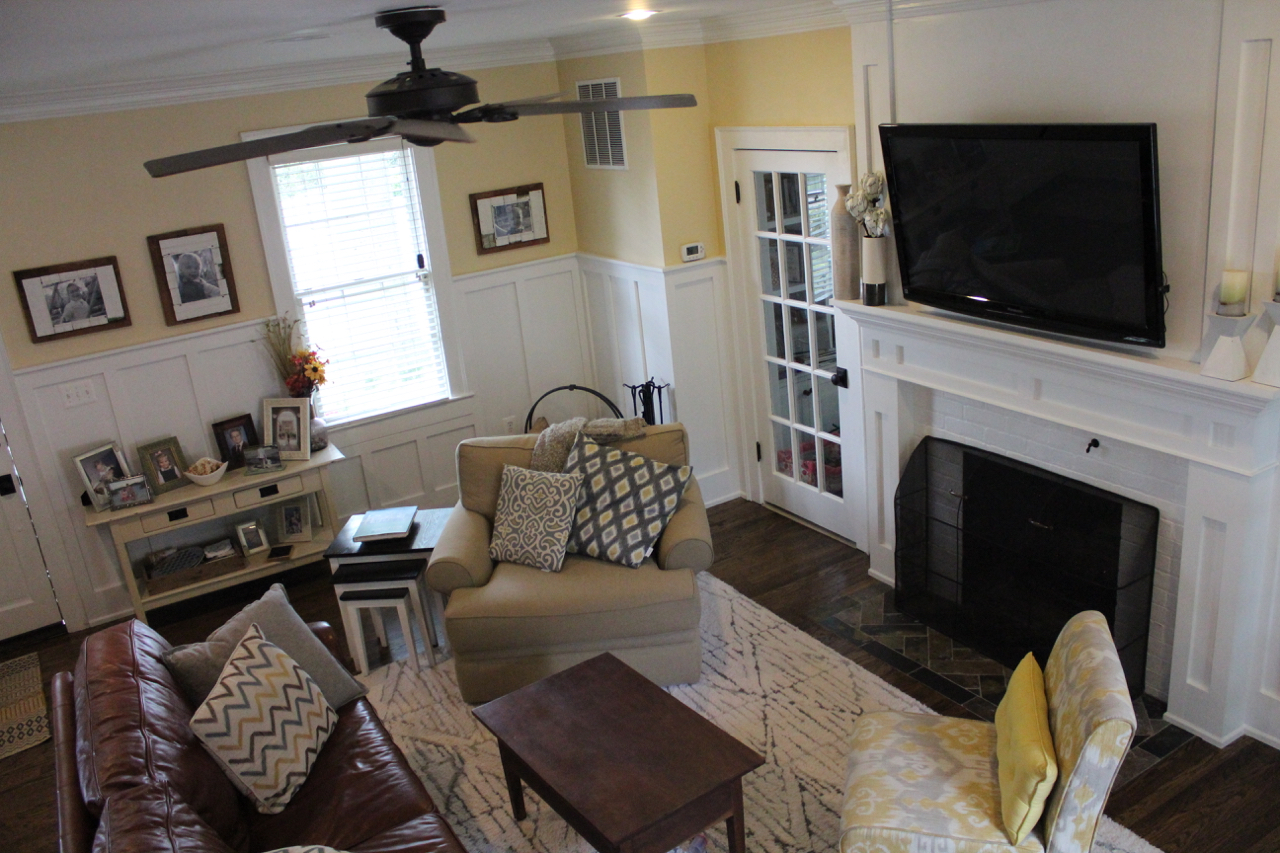
Fireplace Beautification
The fireplace has undergone quite the makeover this week and, even though it’s not quite done, I’m excited to show you how it’s coming along.
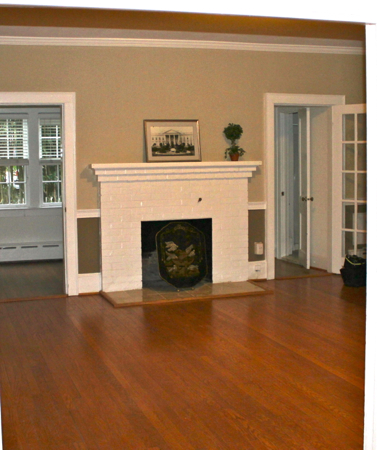
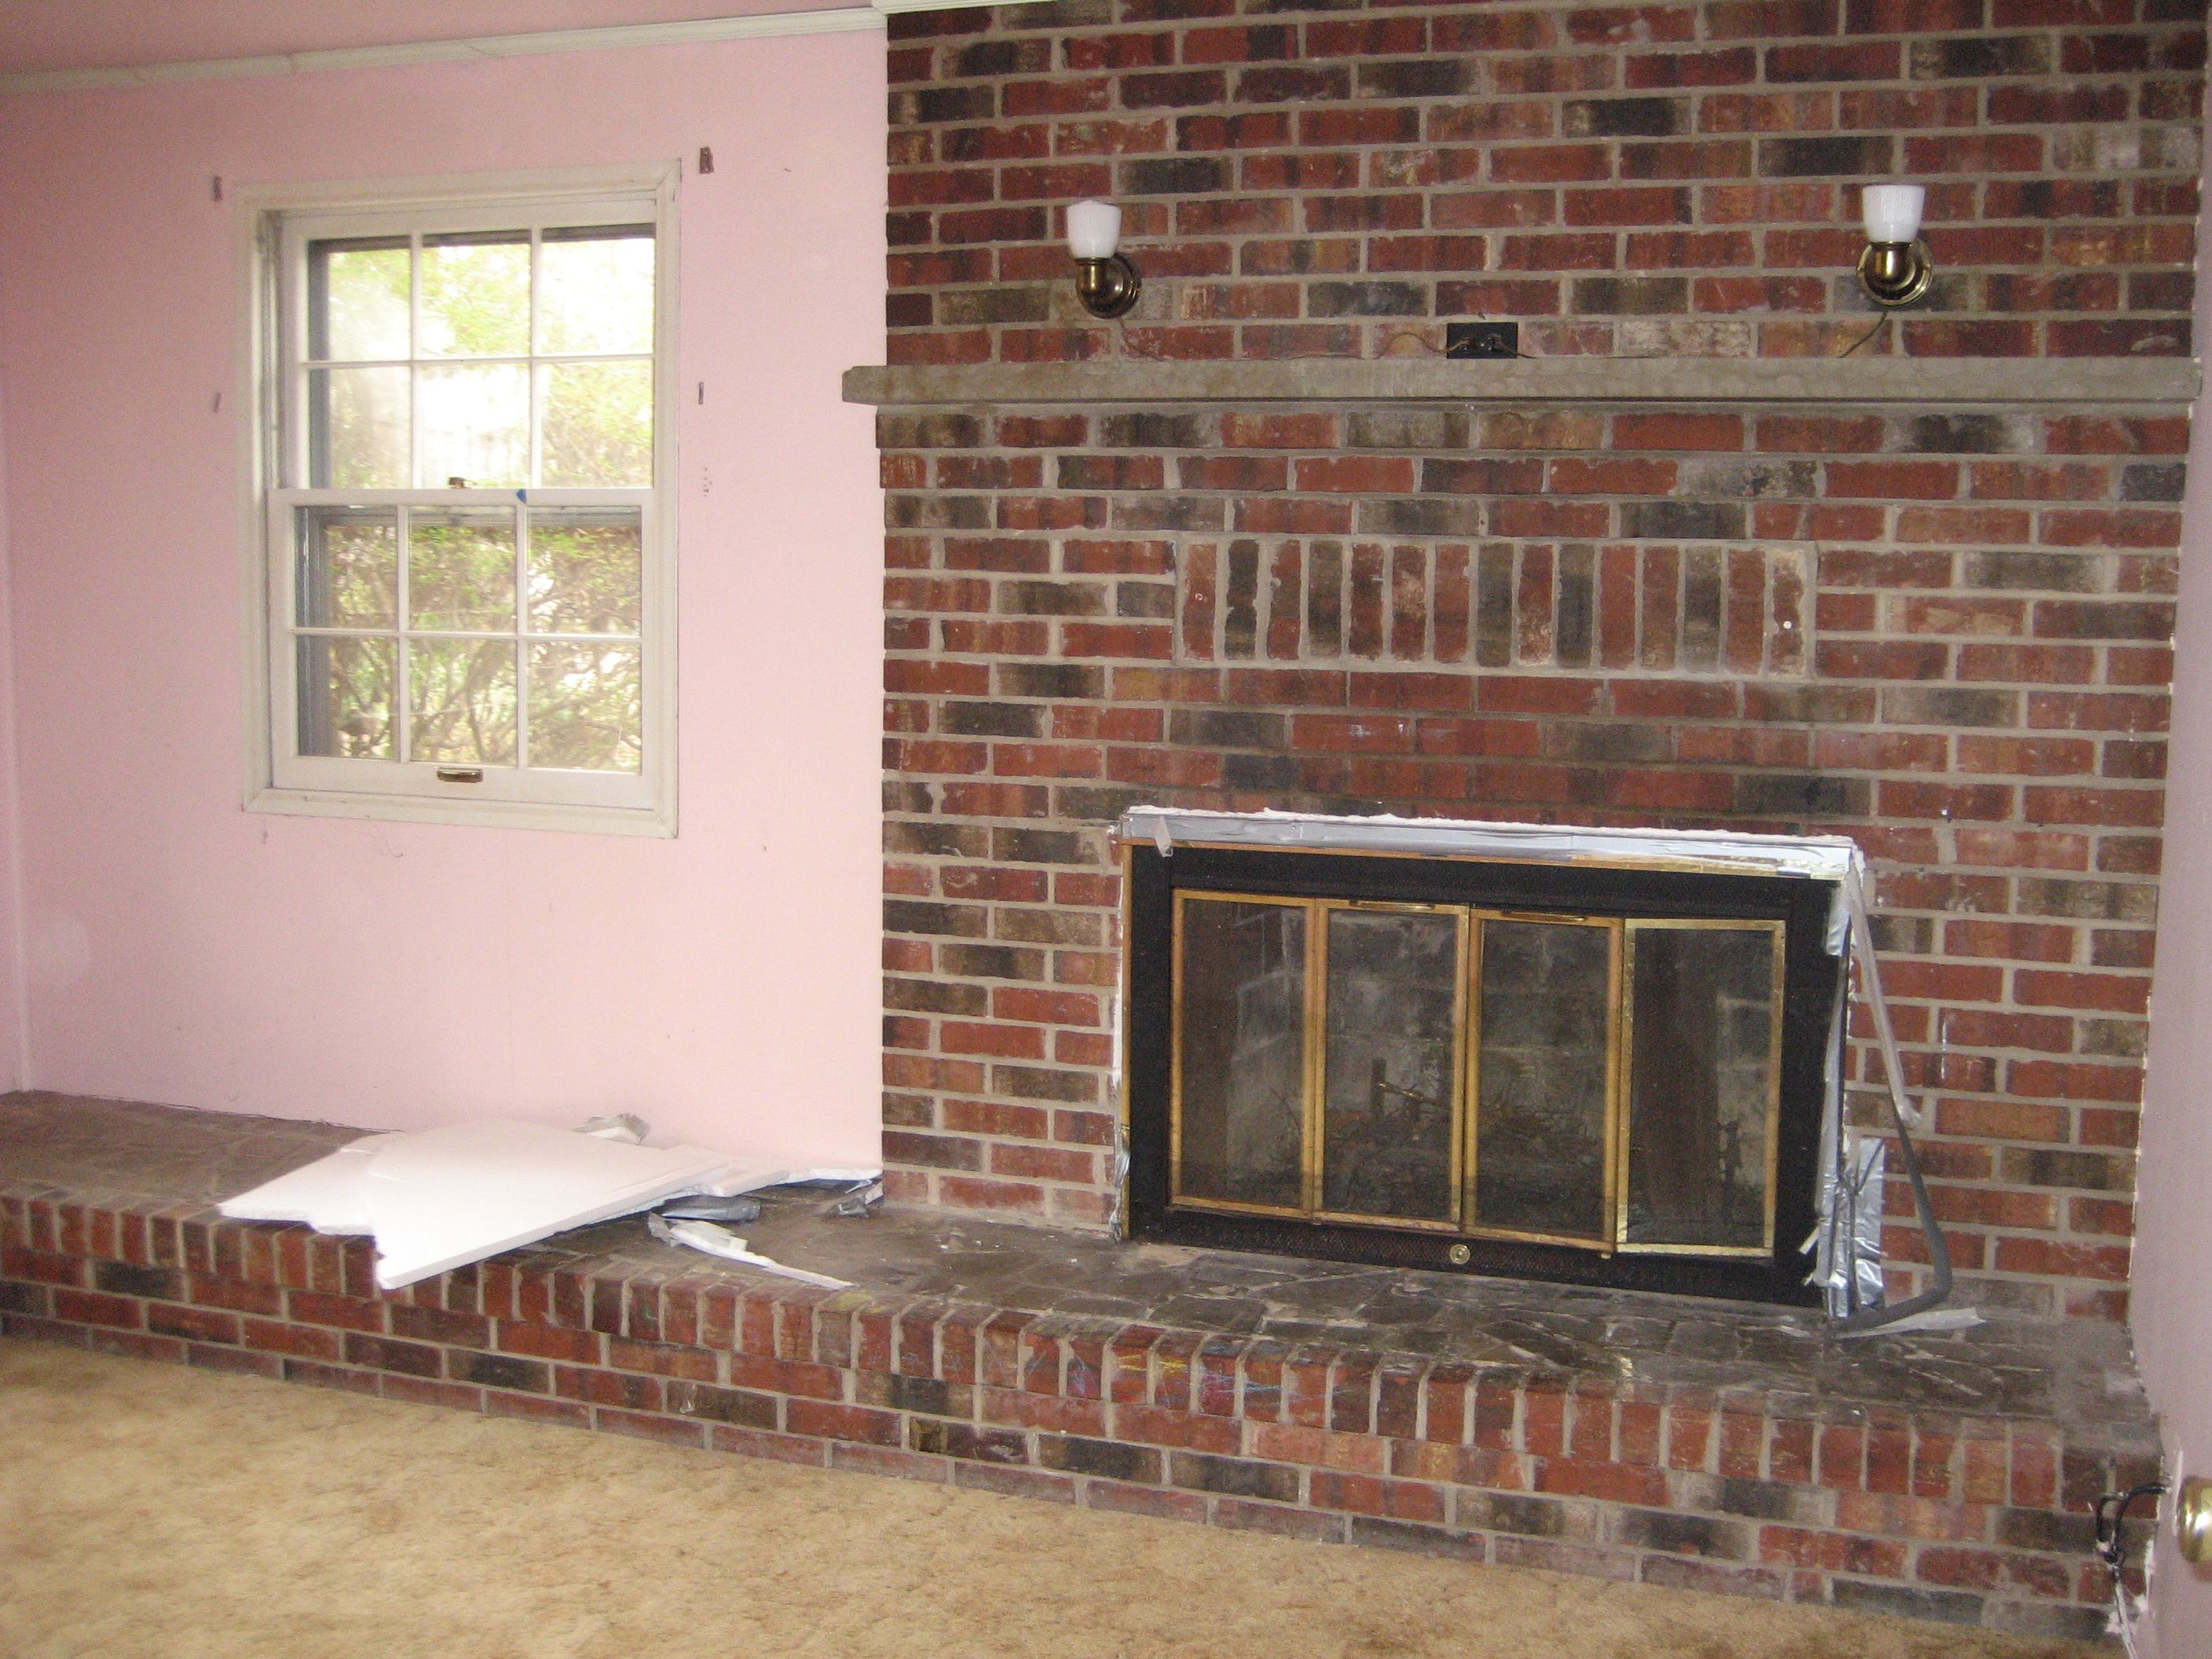
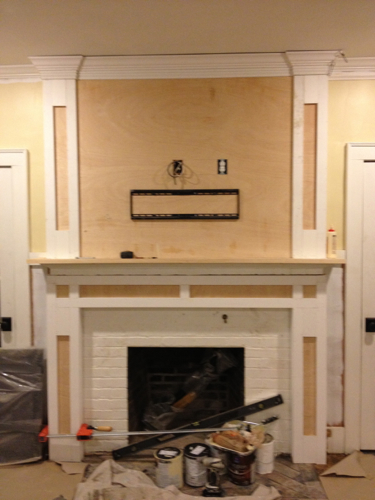
When we first purchased the house the fireplace, the focal point of our living room, looked like this:

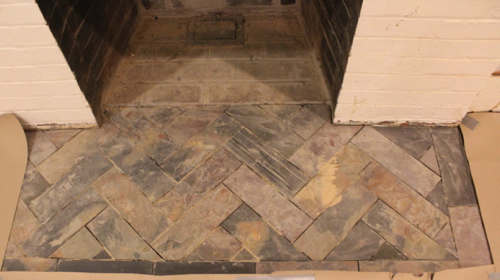
You may remember how back in this post we tore out the old quarry tile in the hearth and replaced it with slate set in a herringbone pattern.
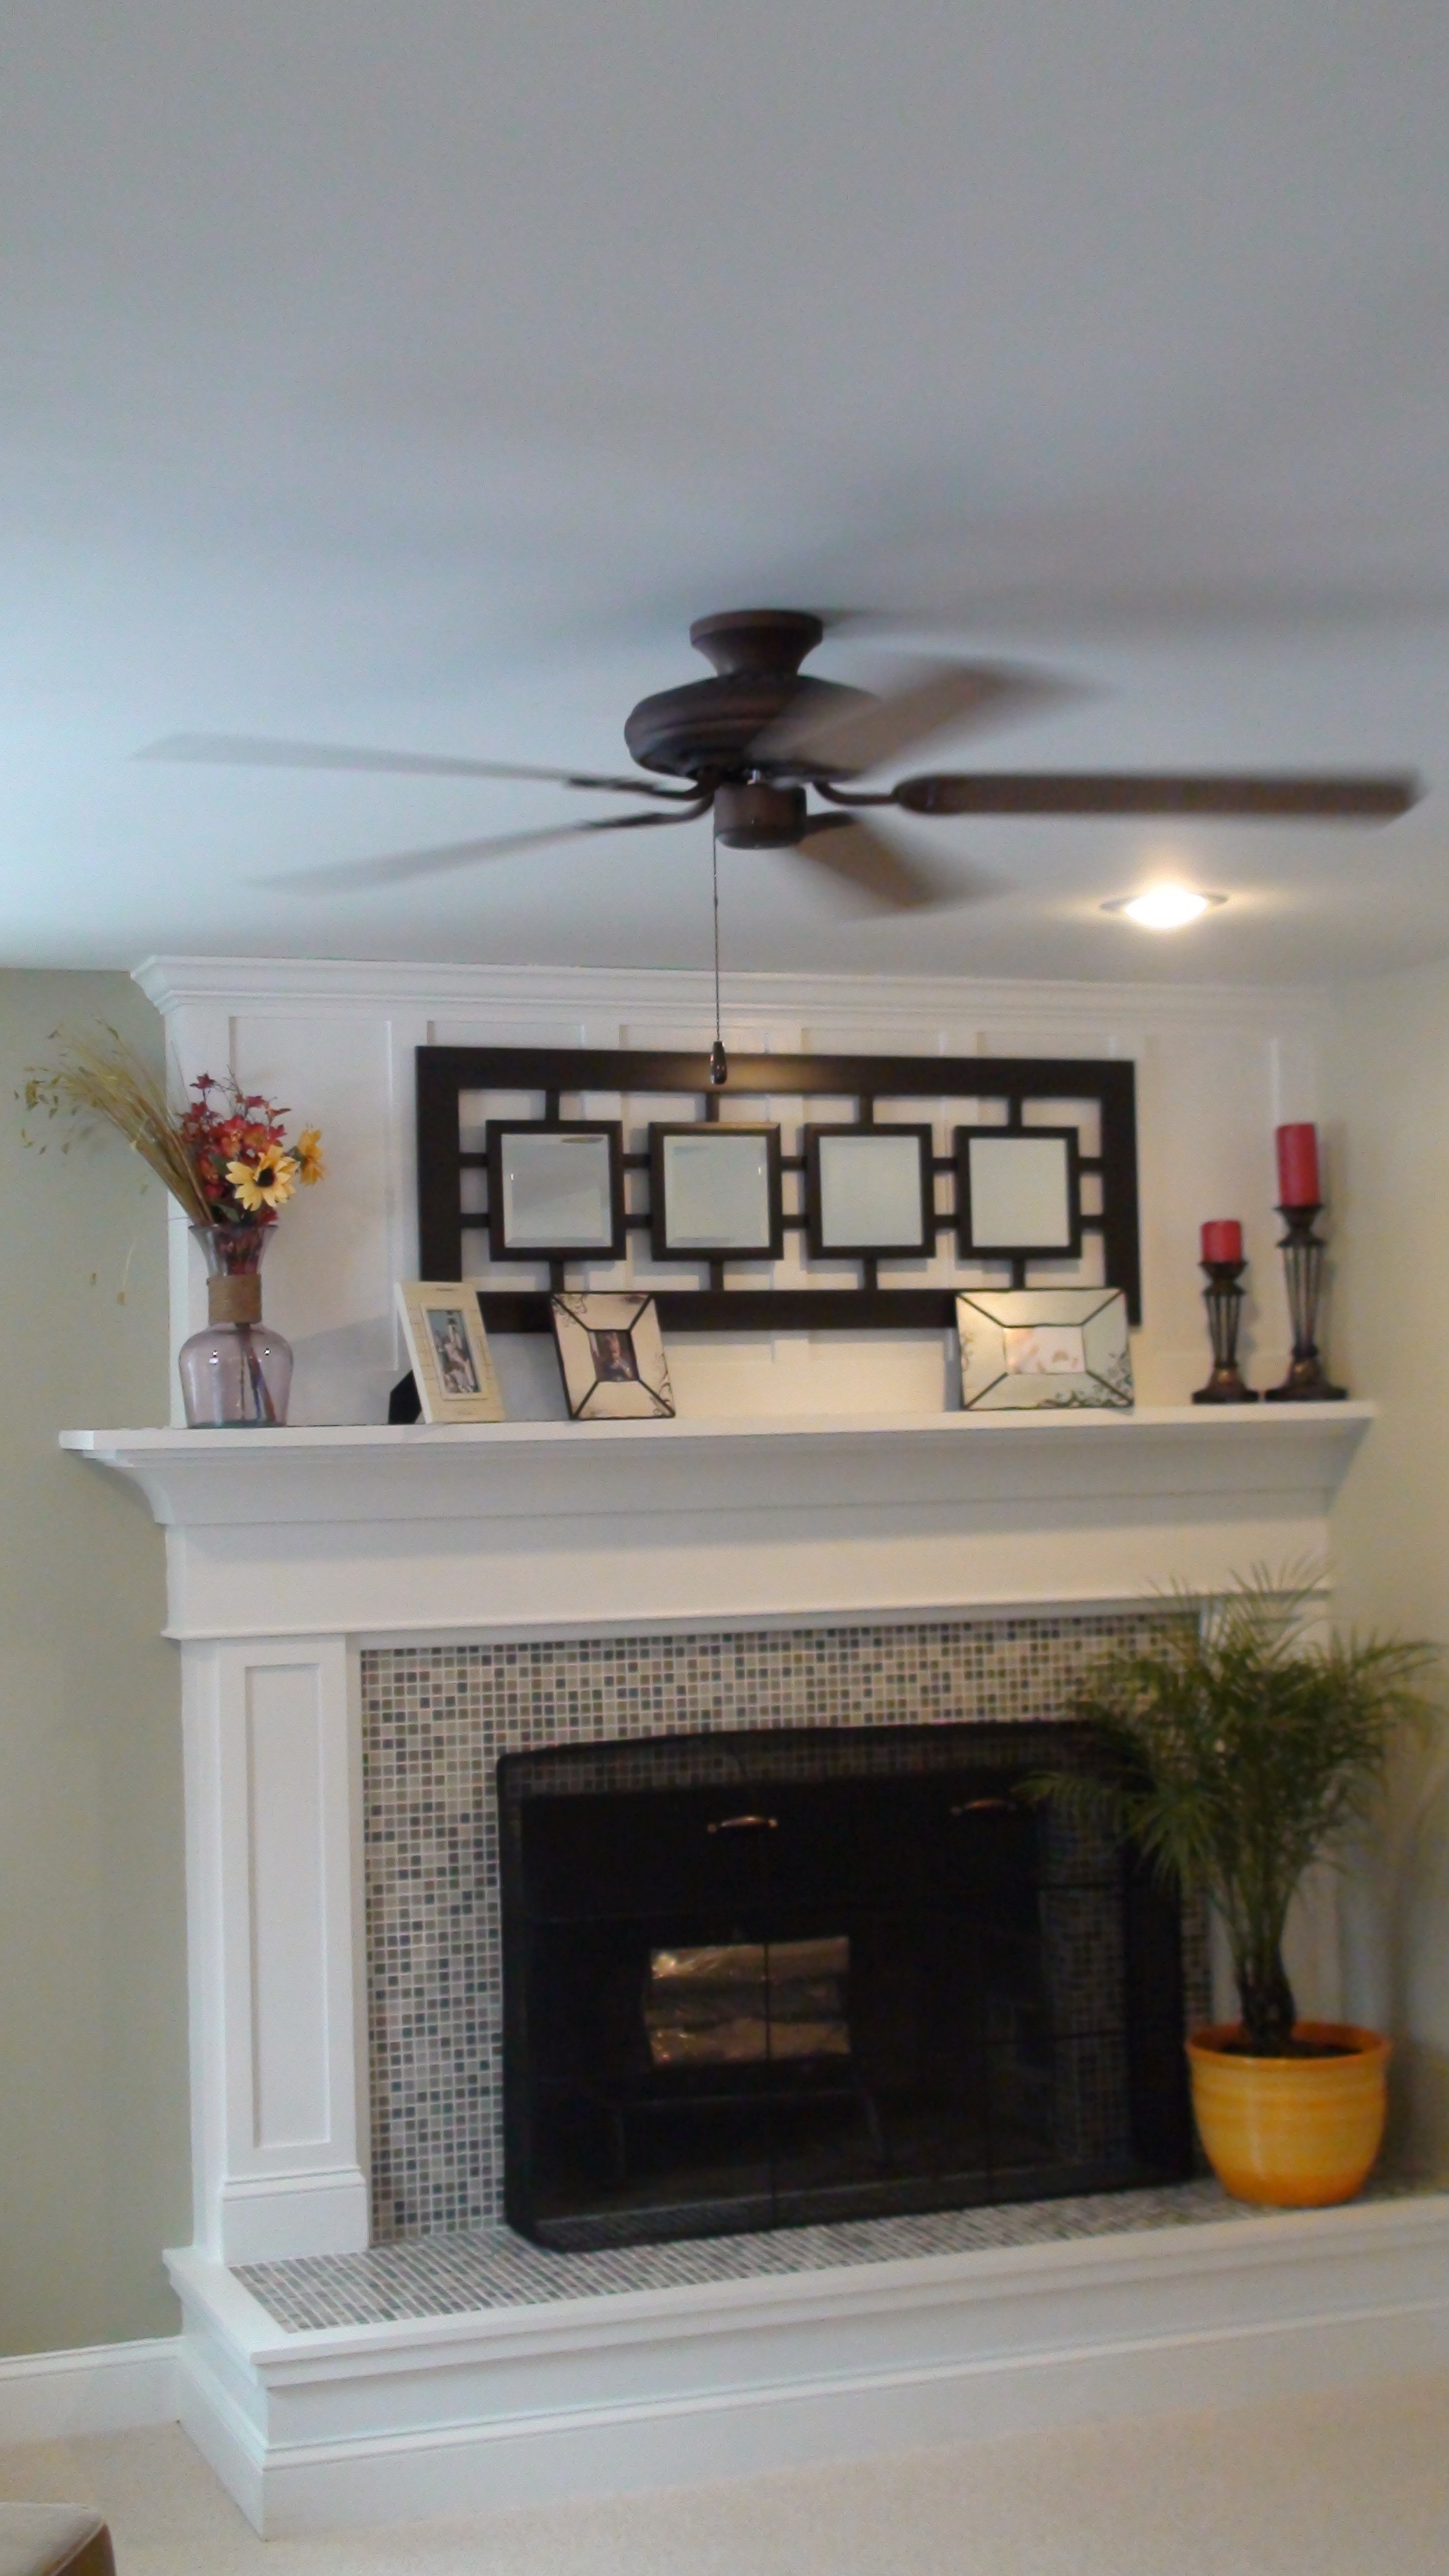
That was just step #1 to the whole “Fireplace Beautification” project. After the hearth was finished Pavlo began to tackle the trim around the fireplace (step #2). In our previous house we transformed our nasty brick hearth and fireplace using tile and trim work. Once completed it was easily one of my favorite things about our last home’s renovation. At the risk of sounding vain, it turned out perfectly! Let’s stare at it for a second, okay?
Ahh, it’s looking at pictures like those that motivate me to keep on truckin’ with this construction-site-of-a-house we’re in now. They help me remember that the renovation will in fact end soon and then we’ll be sitting comfy in a “new” home! Alright, enough daydreaming, back to our current fireplace. One of the downsides of owning a charming older home is that these little darlings are just that…little! Because space is slightly more limited we’ve decided to mount any televisions and the one in the living room will be set above the fireplace. It just made sense not only to save space but also from a decorating standpoint. The room was laid out in such a way that we were limited in furniture placement and we didn’t want the two focal points of a living room (fireplace and television) to take away from each other. Having the television mounted above the fireplace definitely eliminated that problem.
In order to allow us to run wires for the tv (cable and dvd lines) we had to fur out above the fireplace with 2-1/2″ metal studs.
 Once the metal studs were installed, we installed 3/4″ furniture grade plywood and mounted the TV to allow for layout of trim.
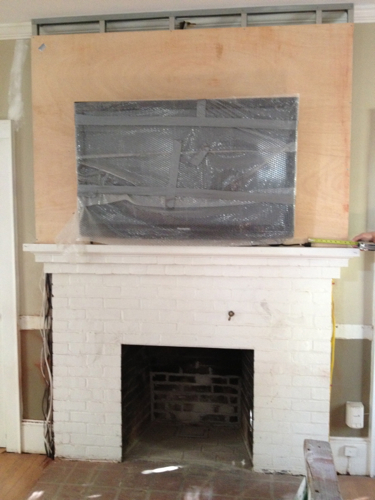
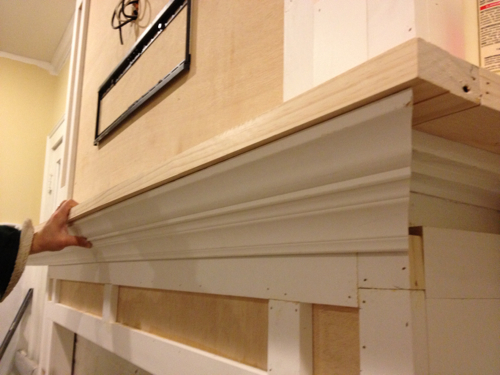
Once the TV was mounted, the columns were laid out and installed. We kept the mantle 1′ away from the firebox to ensure that it was a safe distance away from any flame when we do use the fireplace.
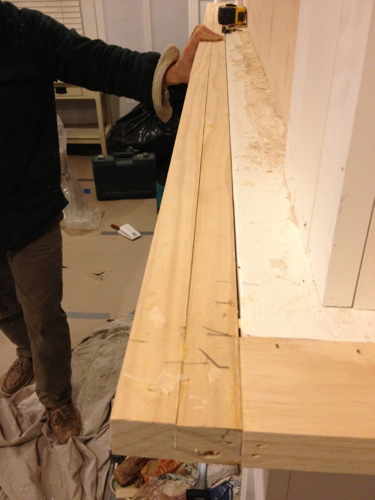
We then started laying out for the actual crown and mantle. The mantle was extended using scrap pieces from the table we had recently built for my parents (more on that here, here and here). This mantle was extended far enough to ensure that the new mantle came past the crown moulding below.
The crown was then added.
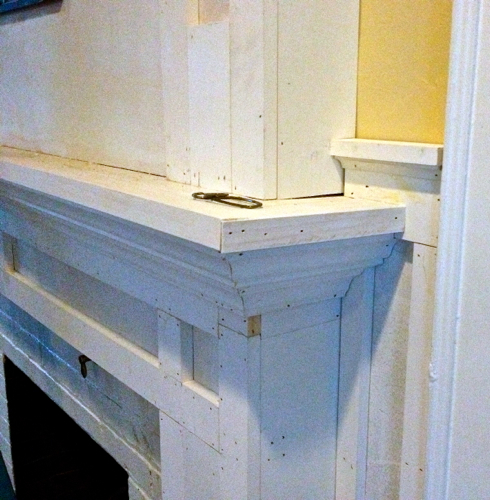
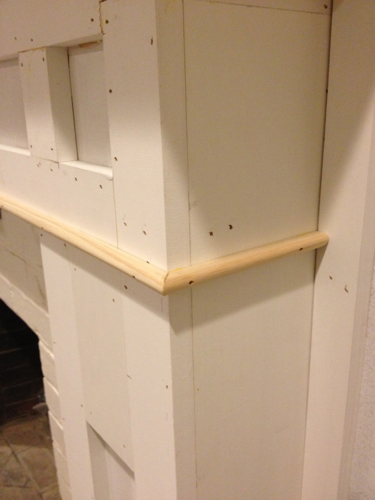
Finally, to break up the columns with the top of the mantle, a pencil moulding was added, also using scrap wood. This pencil moulding was done using a hand plane to create the half-round look.
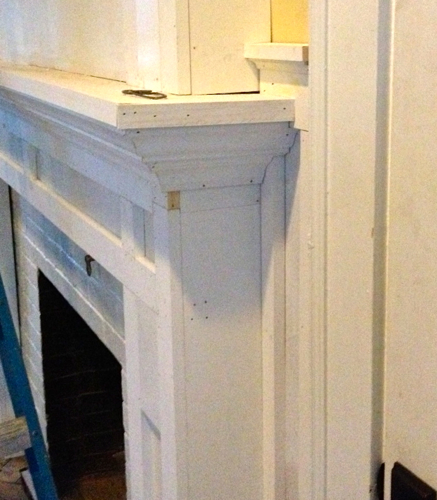
 After all that the fireplace was ready for primer

and now it’s ready for the finishing touches. We have to fill every.single.little.nail hole AND seam, with wood filler, sand it all down, caulk and then final paint! I’m not gonna lie, I wish I could just skip to final paint because it’s the wood filling, sanding and caulking that I cant stand to do. Just thinking about the fact that we have to do it on ALL of the wainscoting, not just the fireplace, makes me want to cry a little! What, no time for that? Oook, off to fill nail holes!